What are Checklist Item Templates?
In TimeTrak, from version 19.2 onwards there is a new checklist item “Checklist Item Template”.
A Checklist item template is a data template, which can be created to display certain data to a user within a checklist.
A working example of where a Checklist Item Template would be useful is:
A mobile user has been onsite and completed a full service on a vehicle, and replaced the brake pads.
The mobile user is required to complete a checklist on “check out” and capture a client signature to approve that the client is satisfied with the work completed.
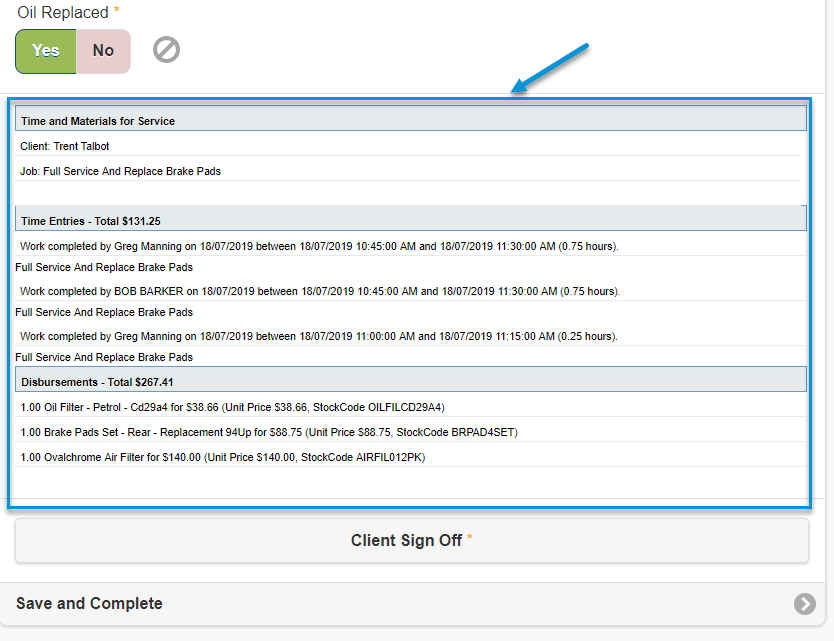
If the checklist is setup with a checklist item template, details of the time and parts used can be displayed for the customer to review prior to signing off the job as per below example:
How to setup checklist Item templates:
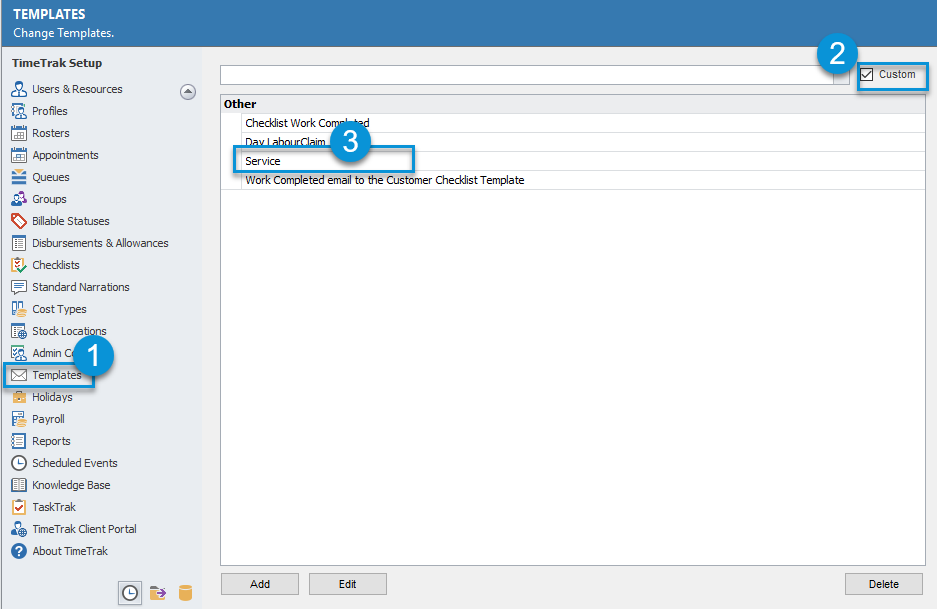
Checklist item templates are housed with email Templates within the TimeTrak Administrator Console as per below:
- TimeTrak Administrator Console
- Templates
- Custom
To Create a new Checklist Item Template:
- TimeTrak Administrator Console
- Templates
- Add > Add Checklist Item Template ;
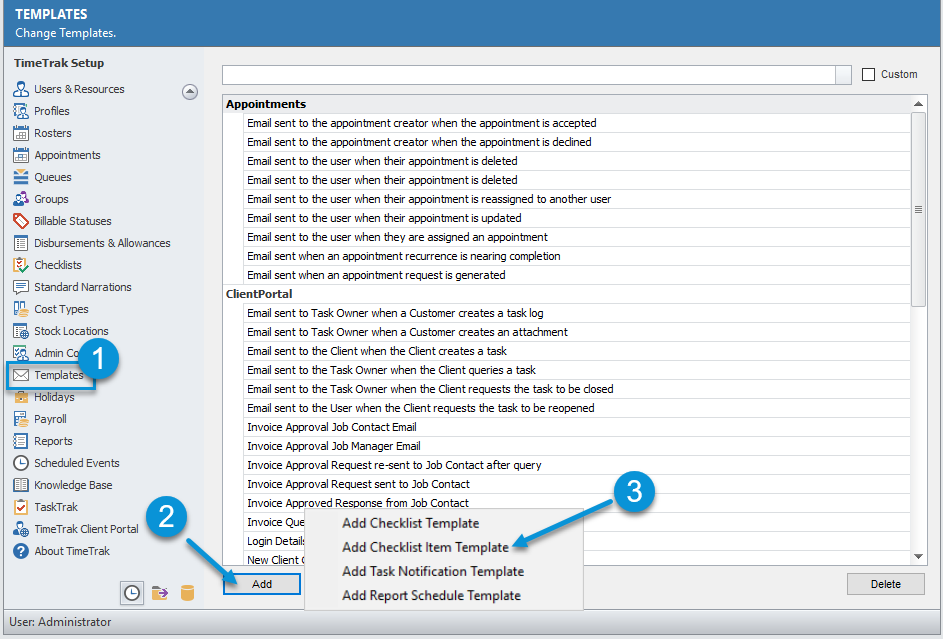
1. Give the checklist item template a name (you can have numerous checklist item templates setup).
2. Select the date period of which the data is going to display:
Today
Only display data relating to the item (job/task) you are completing the checklist for which has been added today.
Yesterday
Only display data relating to the item (job/task) you are completing the checklist for which was added yesterday.
From Check In
Only display data relating to the item (job/task) you are completing the checklist for which was added in the current check in.
All
Display all data relating to the item (job/task) you are completing the checklist for regardless of the date it was added.
3. Unposted.
If unposted is ticked then only data that has not yet been posted to your ERP system and meets the date range requirements will display.
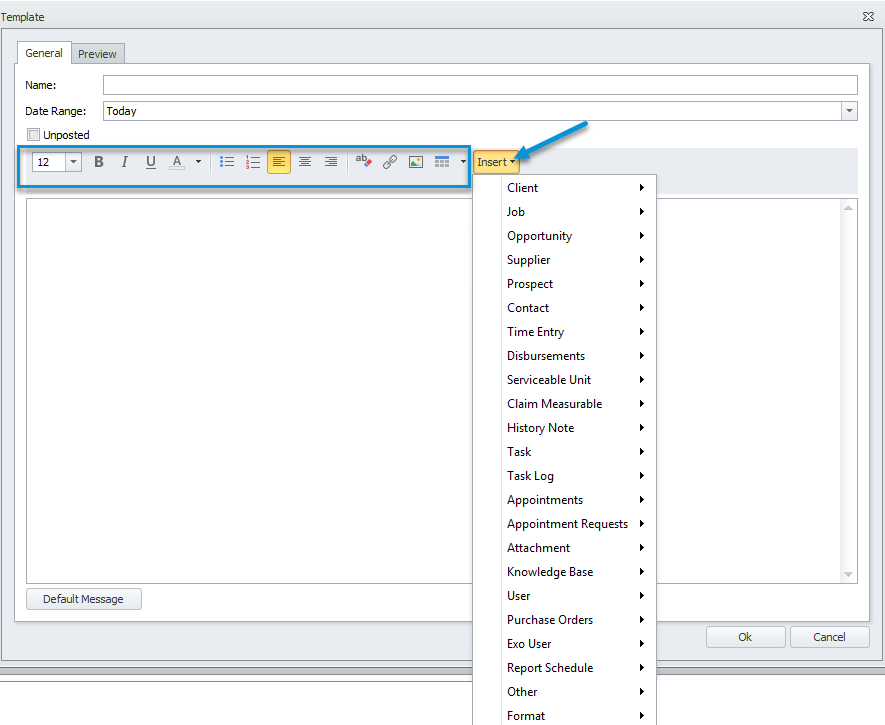
4. Create the data template.
Similar to our email templates, the Checklist item template is an HTML editor and the controls can be used to format the template.
Data can be inserted using the “insert” drop down and selecting the applicable data field:
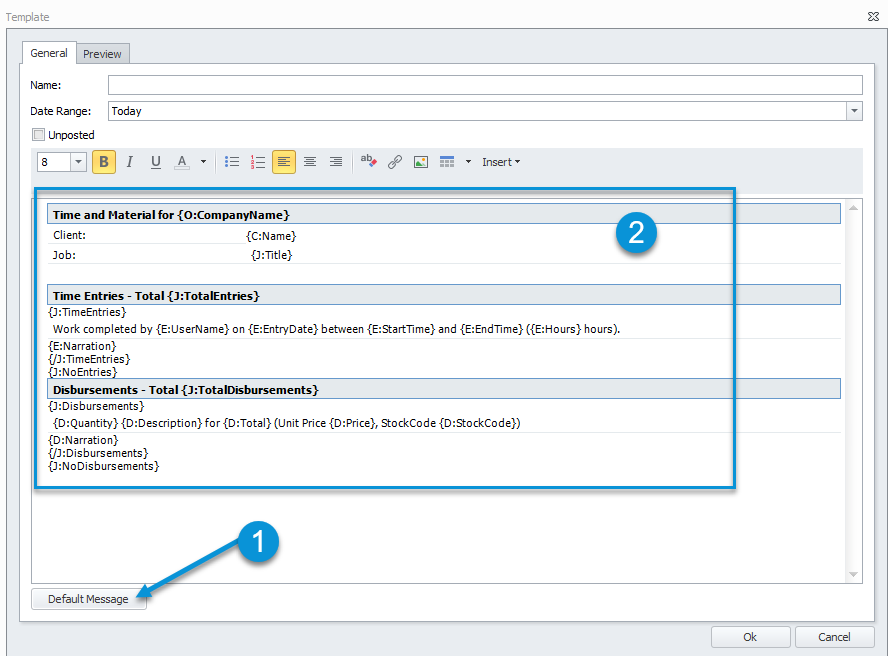
You can click “Default Message” to populate the template with our “default” checklist item template and then alter the template from this point if required.
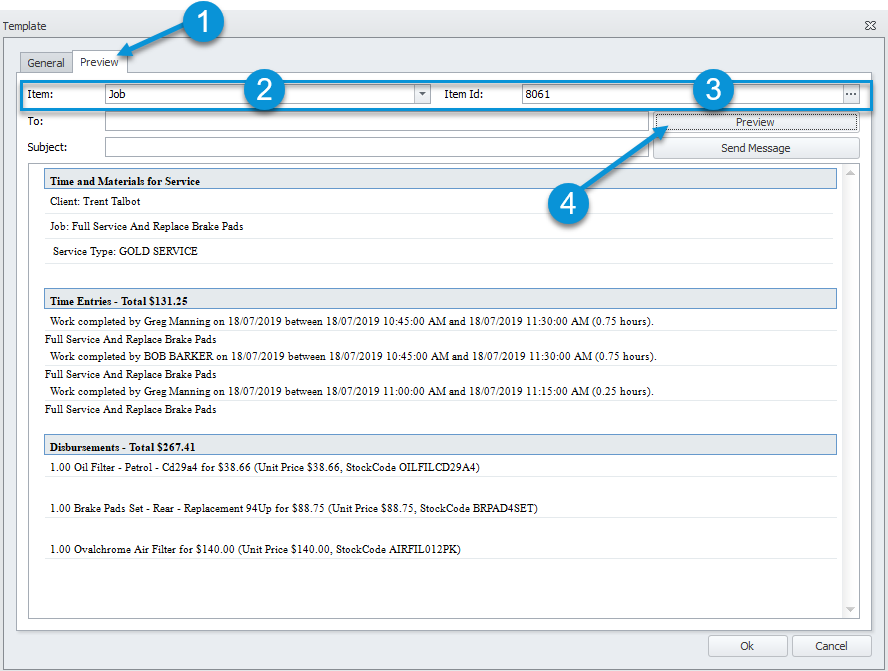
Preview Checklist Item Template data:
To preview the data that is going to display within the checklist item template:
- Click the preview tab against the template
- Specify the Item type (Job/ Task)
- Specify the item type Id (JobNo or TaskId)
- Preview
As per below you will be able to review a sample of how the checklist item template will display and review the formatting.
Add Checklist Item Template to a checklist.
There is a new Checklist Item “Checklist Item Template”.
Within the required checklist(s) create a new checklist item
- TimeTrak Administrator Console
- Checklists
- Add (to create brand new checklist)
- OR, as per below select the applicable checklist you wish to add the checklist item template to
- Add (to create an additional checklist item)
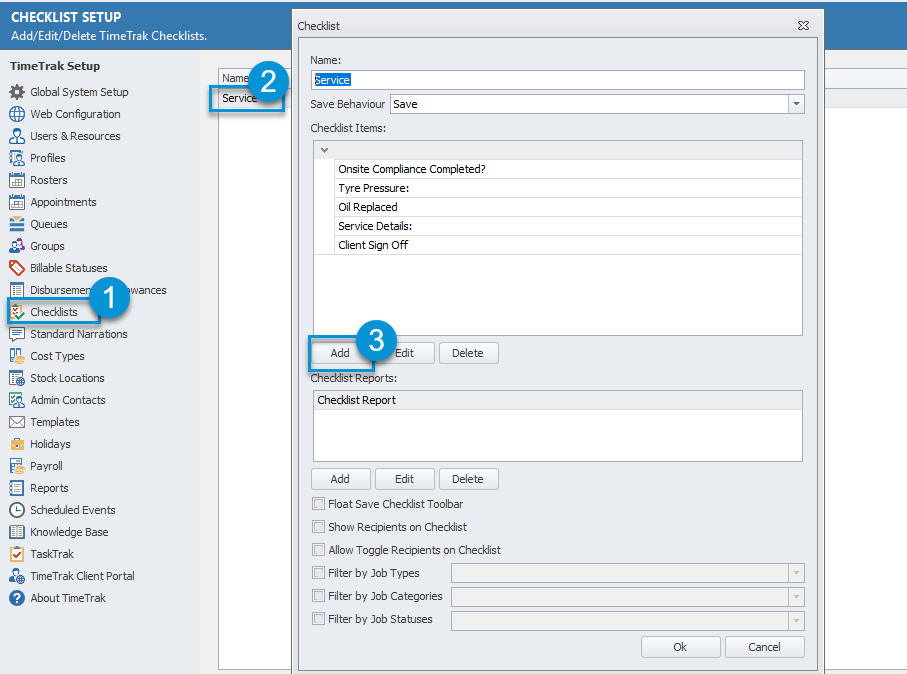
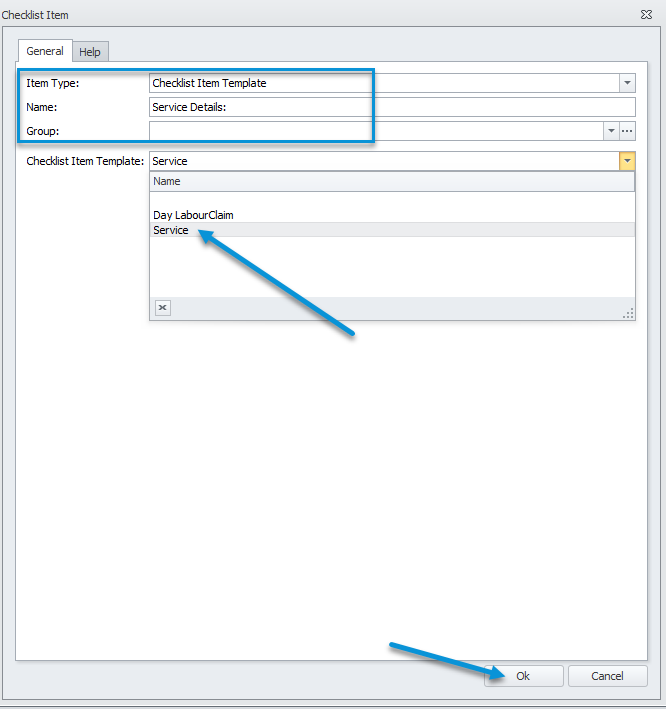
- Select the Item Type “Checklist Item Template”
- Give the item a name
- This doesn’t display in the checklist on mobile, but is the label within the checklist setup configuration
- Specify the checklist group the item should display under.
- Pick the applicable Checklist Item Template from those that have been setup in Templates as per previous steps.
- OK
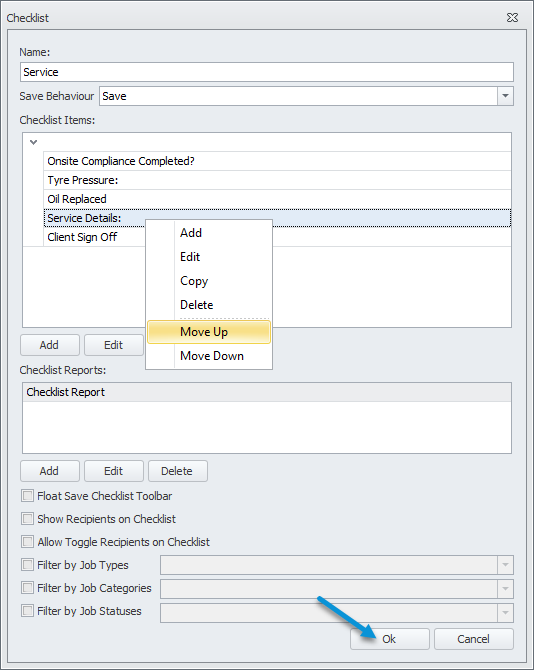
You can right click and move the position of the item in the checklist by selecting “move up” or “move down” as per below: In this case before the client signature.
Once happy with the changes click OK
Custom Fields:
If you have, custom fields these can be included in the checklist template but you will need to manually type the custom field name.
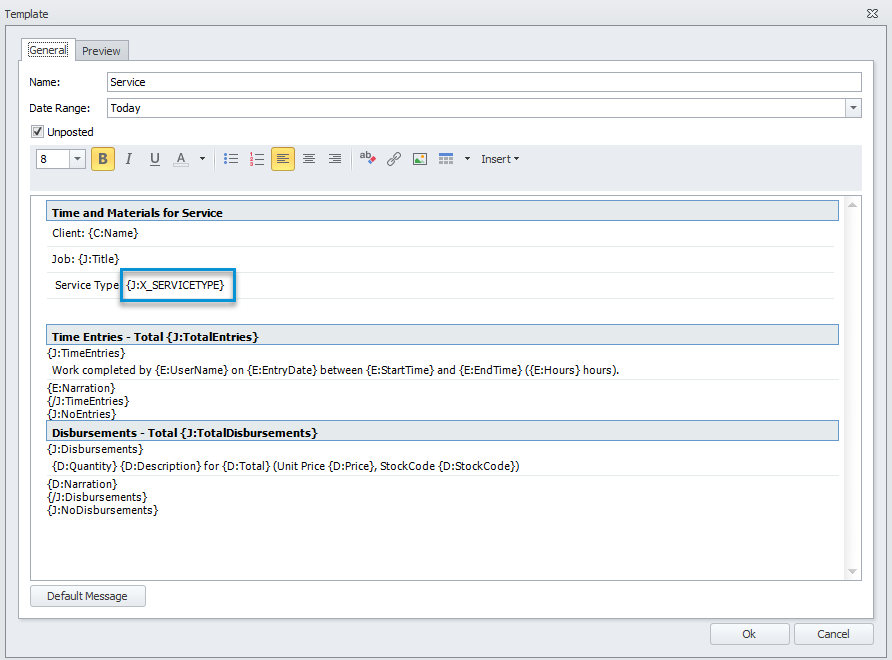
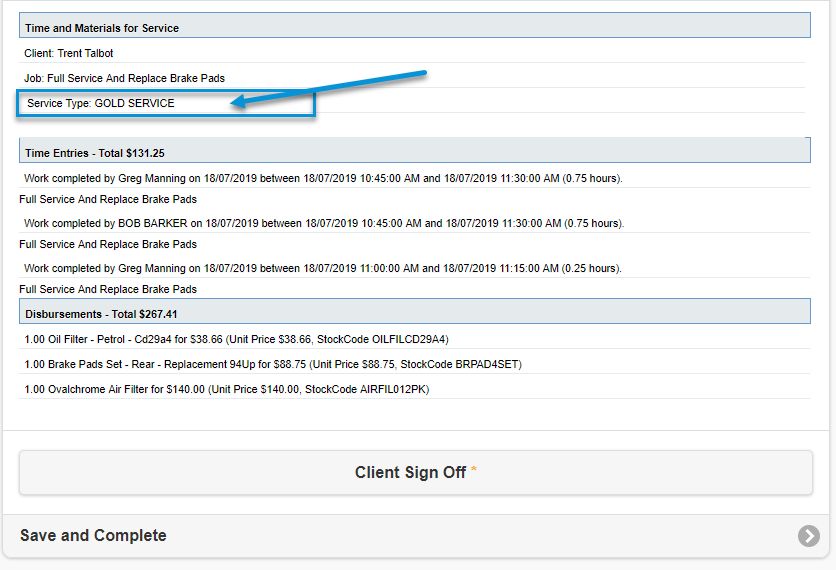
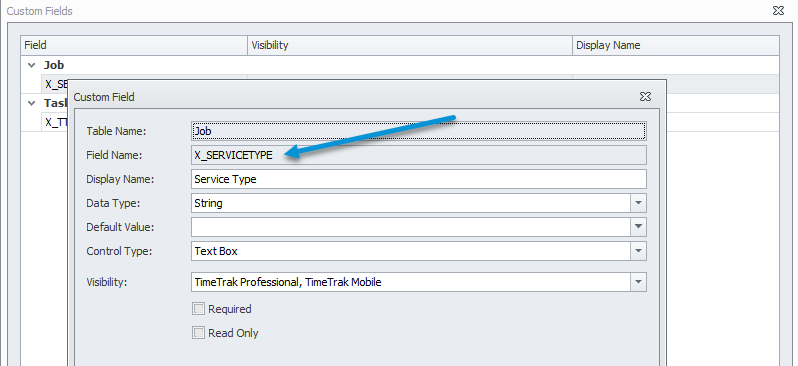
In this example against jobs, there is an extra field “Service Type”.
The field name is X_SERVICETYPE as per below:
For more information on custom fields in TimeTrak, click here.
Within the checklist item template, you will need the data prefix before manually typing the custom field name.
In this example, Job Title has been selected as per below:
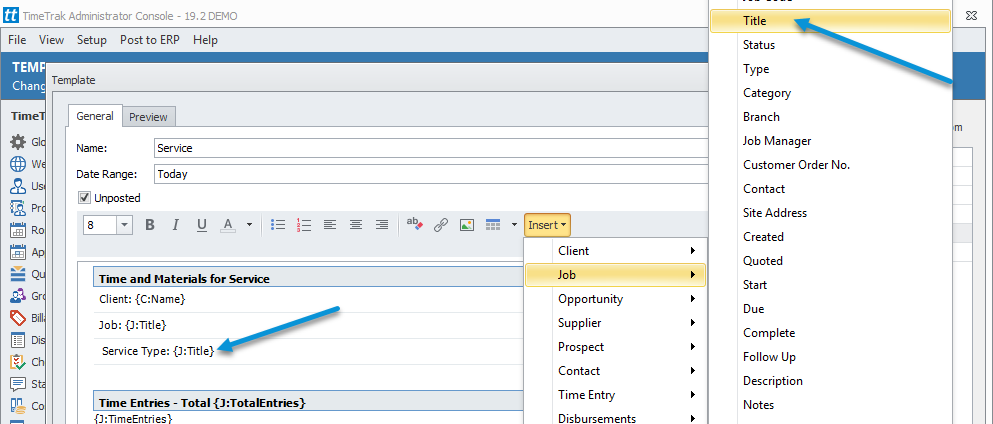
“Title” can then be removed, and the custom field name “X_SERVCICETYPE” can be types as per below:
