Did you know that in TimeTrak Professional, there is the option to update more than one client, job or serviceable unit at one time?
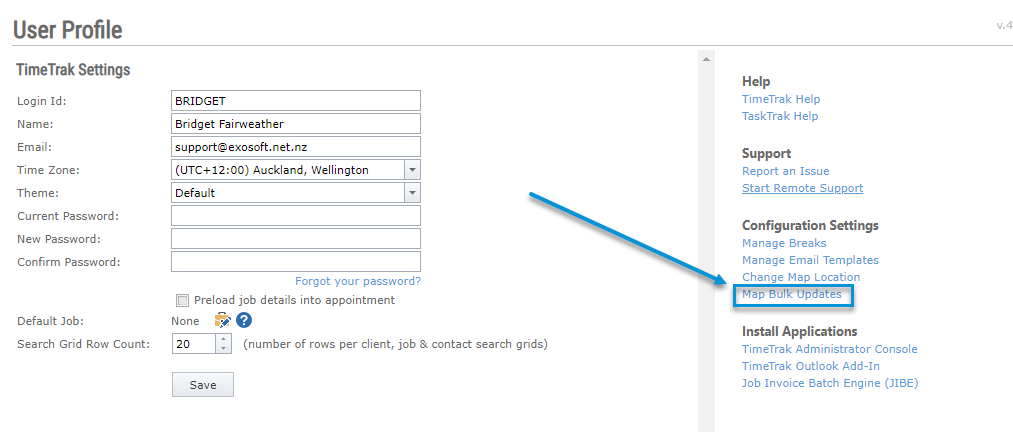
Under the User Profile setting, there is a link called “Map Bulk Updates”, which is a very useful setting, especially when you are adding multiple clients at the same time. For instance, once you have finished an implementation of TimeTrak, you can update all clients, jobs or serviceable units in one location, rather than going to each and every one individually.
When you click the link, you will see a window with maps and all your clients/jobs/serviceable units on the left side.
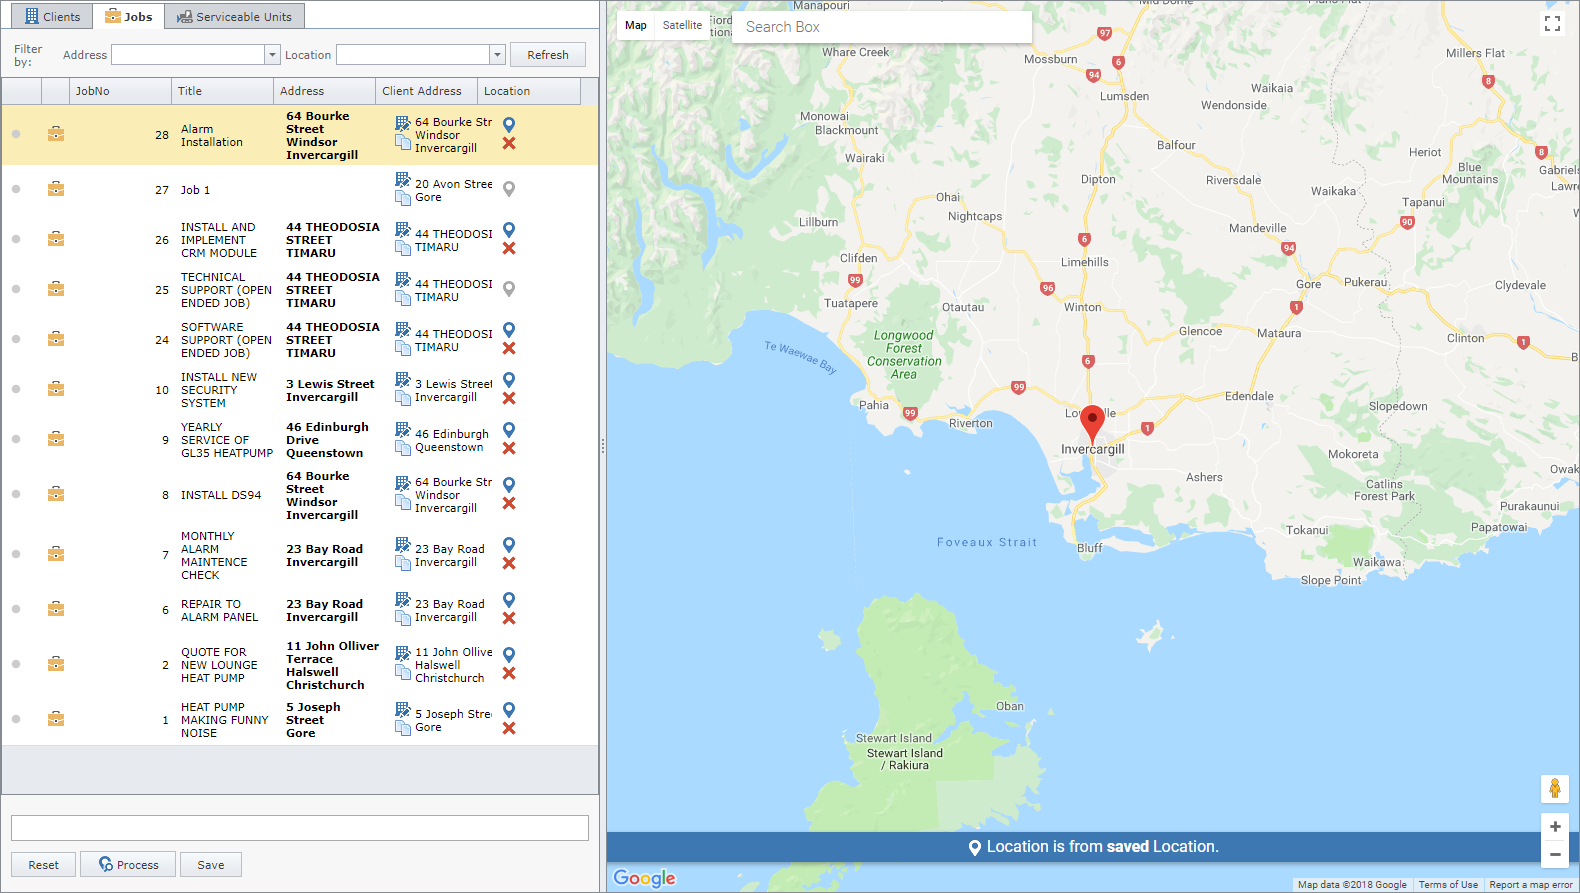
At the top of the window, there are tabs for Clients, Jobs, and Serviceable Units. By default, it only shows Clients and Jobs, but it depends on your company. If your company using Serviceable Units, there is a setting in Administrator Console to show this. Click here to find out more about Serviceable Units.
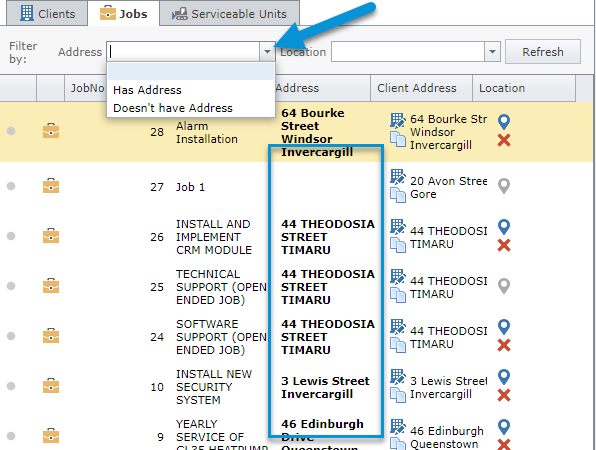
In this window, you can also filter the data based on the address and location:
Address
This filter shows you the Client/Job/Serviceable Unit based its address or not. For example, in Serviceable Unit, you can see some units don’t have an address in their column. This is very useful if you want to add or update their location without accidentally changing the location of existing Serviceable Units/Jobs/Clients.
Location
This filters the data based on if the Client/Job/Serviceable Unit has their geo-location set up.
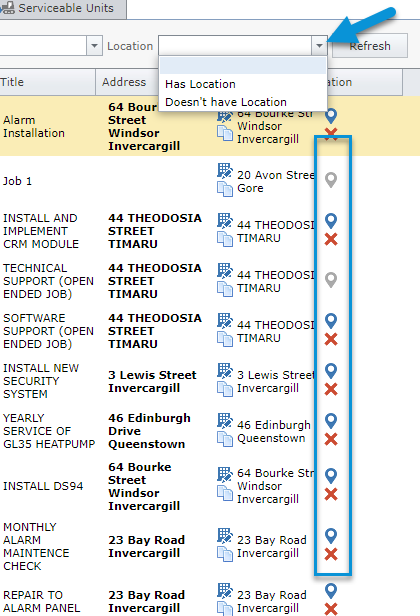
 This icon means that the Client/Job/Serviceable Unit does not have a geo-location set.
 This icon means that the Client/Job/Serviceable Unit has a geo-location set. Note: the geo-location can be different to the data that is displaying, as the address can be different if a user has manually set the geo-location.
 This icon allows you to remove the set geo-location.
Update Geo-Locations
There are few steps you need to complete before you bulk update the geo-location of your data.
1. Click on the left icon to go to Clients, Jobs, or Serviceable Units icon
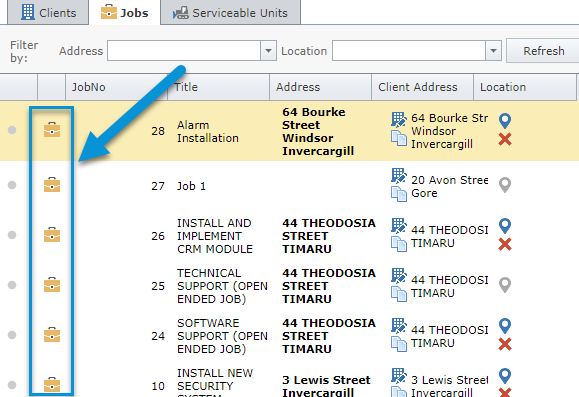
We do this simply because we have to enter their address especially for a Client/Job/Serviceable Unit that hasn’t had an address entered before.
2. In their profile, enter the site address or postal address (for Clients)
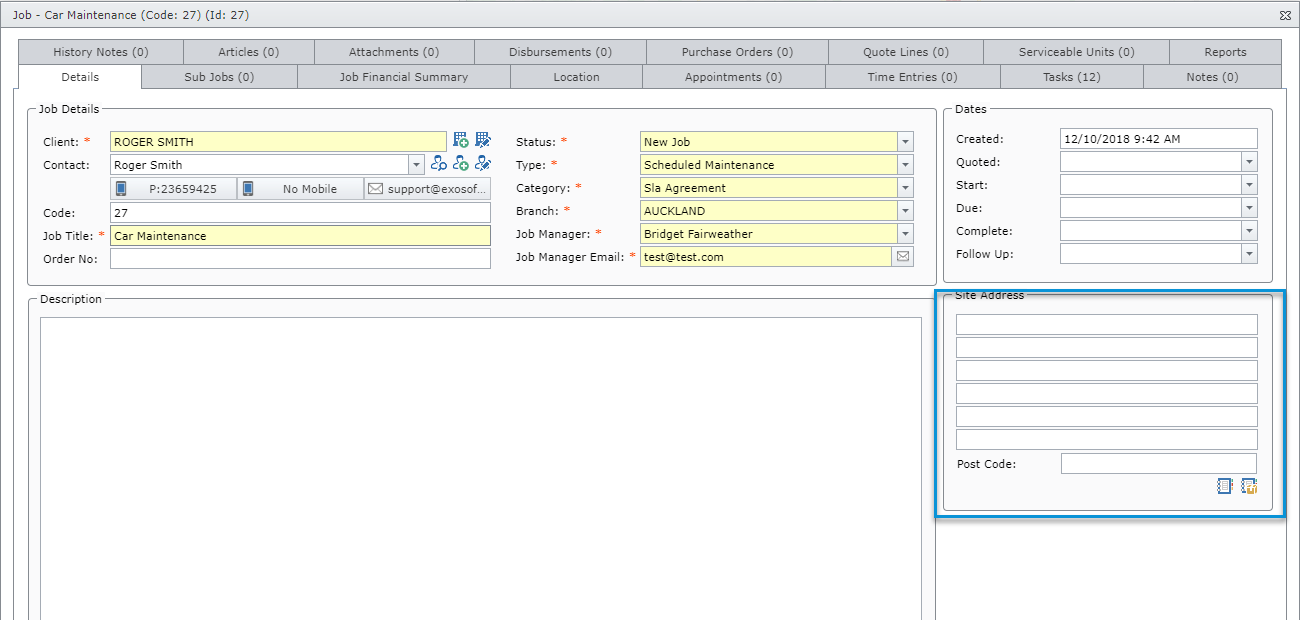
This process is to make it easy for Users to find the location of the Client/Job/Serviceable Unit. Even though you can manually set the geo-location without the address (this will be explained later), it’s better to enter the address right away.
Another setting that you can find here is when you set up a Job’s location or Serviceable Unit’s location, you can click the icon at the bottom of postcode to copy a client’s or job’s location if the location is the same.
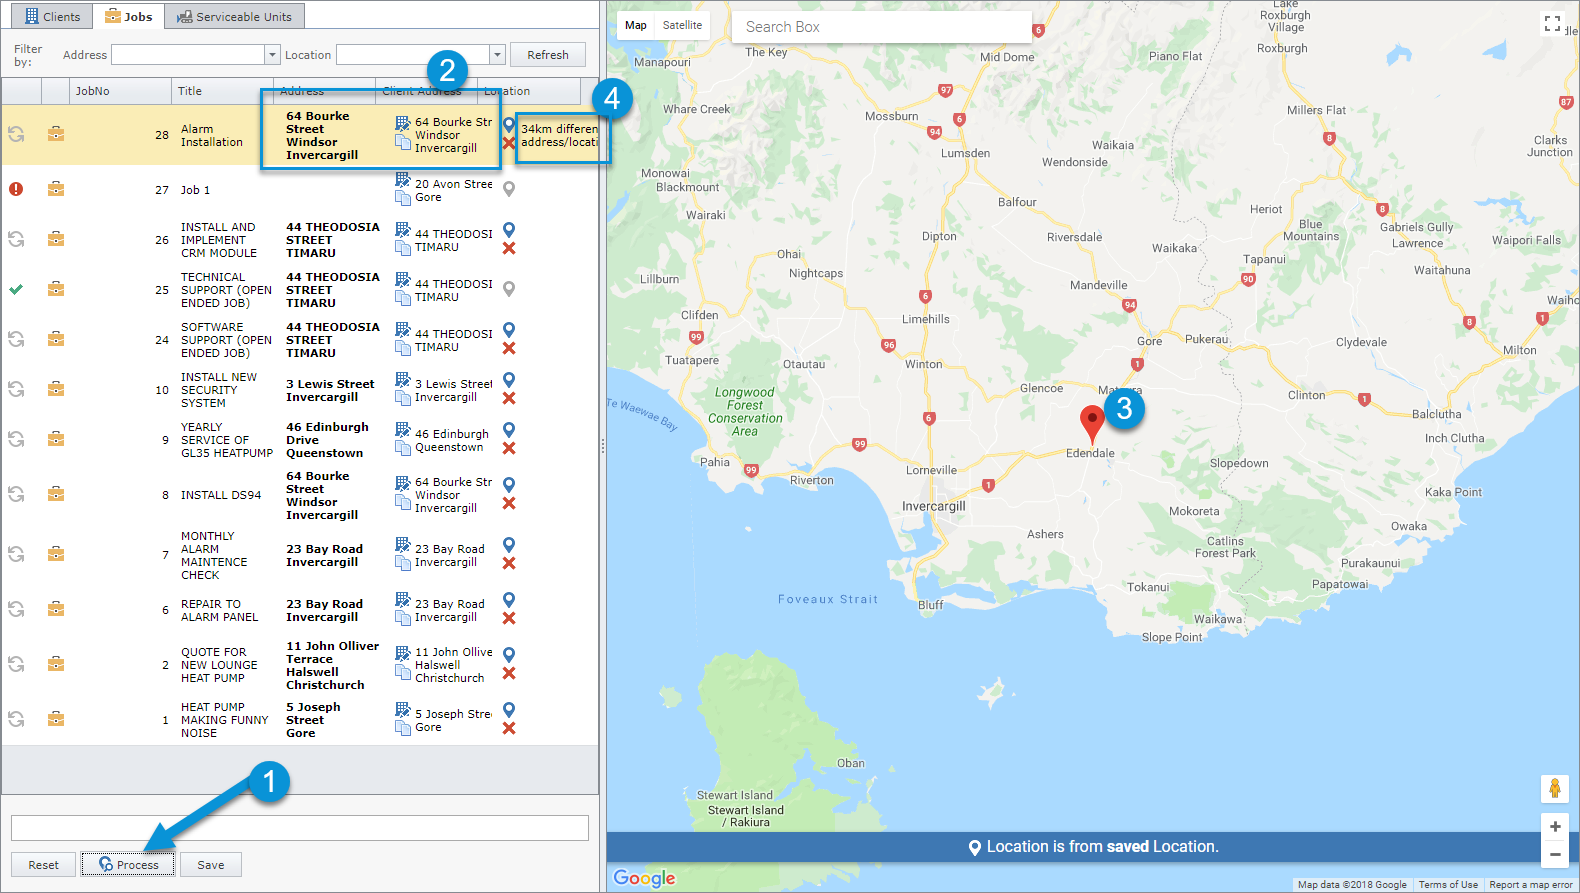
3. After entering the addresses of all the data you are wanting to update, go back to the main window and you will see that this has been filled with the addresses. To check the map, click the Process button down there. And you can see the distance difference of previous geo-locations and the address you entered recently.
Note: You can set the location even without entering the address by dragging the pin on the map and then click the pin icon on the “Location” column. This will save the location if you don’t know the address of the Client/Job/Serviceable Unit.
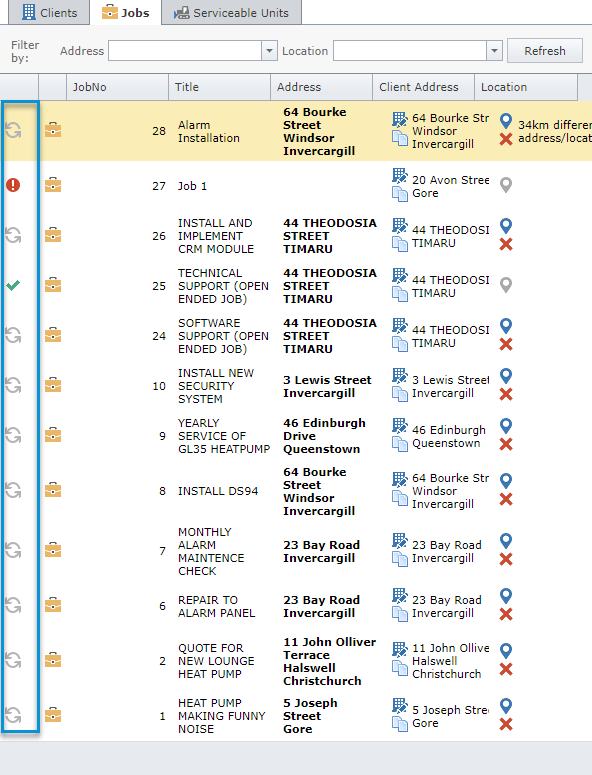
After you clicked Process and the window showed information of the distance difference, you can click the icon on the left to sync the geo-location according to the address you already entered.
If you have any further questions please contact the Exosoft team via email: support@timetrak.net.nz or phone NZ:0800 12 00 99 | AU:1800 60 80 77