Task Import templates where introduced in TimeTrak from version 4.0. To read more about this, refer here.
Since then there has been a few changes to enhance this functionality.
An example of where this feature is useful is in cases where you have project jobs and in order for the project to be completed pieces of work (tasks) need to be completed by different users.
To prevent users needing to setup these tasks one by one they can be imported to TimeTrak via a spreadsheet template.
TimeTrak accepts task import spreadsheets in the below format:

The TaskOrderNo field defines the task layering.
I.e. 1 and 2 are single tasks against the job task 2.1 and 2.2 are sub tasks of task 2.
Note: The below two columns have been added since version 4.0;
TotalFromSubTasks – Added in version 19.2.1
GroupName – Added in version 20.1.12
The Total From Sub Tasks column provides the ability for the user to define the parent task as having Total from Sub Tasks enabled, as per the below example:
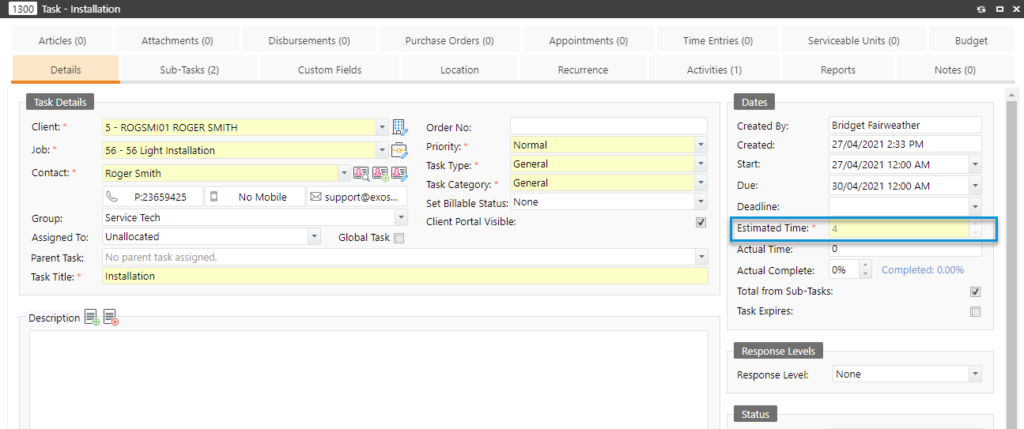
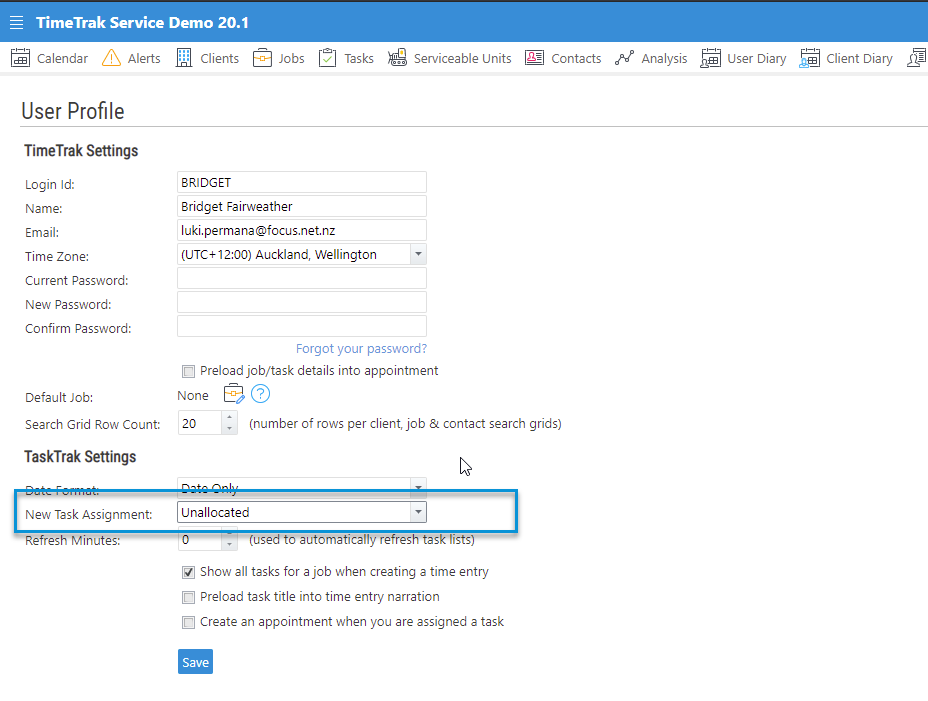
By default, when tasks are imported they will be assigned to the logged in user’s default group and either assigned to Unallocated or the logged in user depending on what they have set in the New Task Assignment setting via Personalise in TimeTrak Professional:
The Group Name column provides the option for the group to be specified in instances where the tasks are assigned to multiple groups.
In order for the task to be assigned to the group the Group Name needs to be spelt exactly as it is within the system.
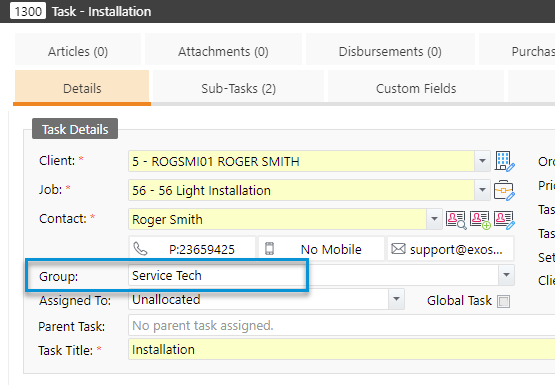
When a group is specified within the import file, upon import the task will be assigned to the specified group and Unallocated.
This is useful in instances where admin or sales staff are setting up projects with tasks and often their group is not the group the tasks should be assigned to.
If your business has standard Task lists, these could be assigned to TimeTrak Template jobs, meaning on creation of a job via the template the tasks will automatically be created.
For more information on this click here
There is also the ability to save task import templates within TimeTrak for users to import via the websites without the need to manually create the import file.
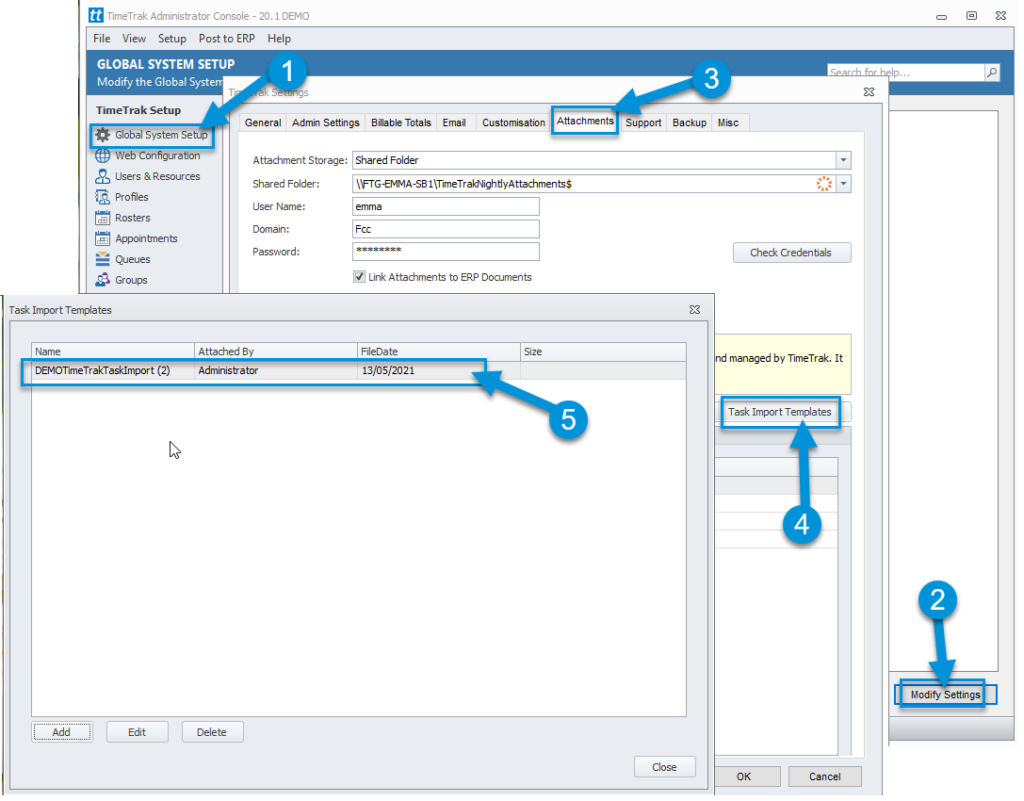
Once you have a task import file setup you can add this to the TimeTrak Admin Console > Global System Setup > Attachments > Task Import Templates, as per below.
In TimeTrak Professional, if users have the ability to Add Tasks against a job they can select the Task Tab and then click Import tasks, as per below:

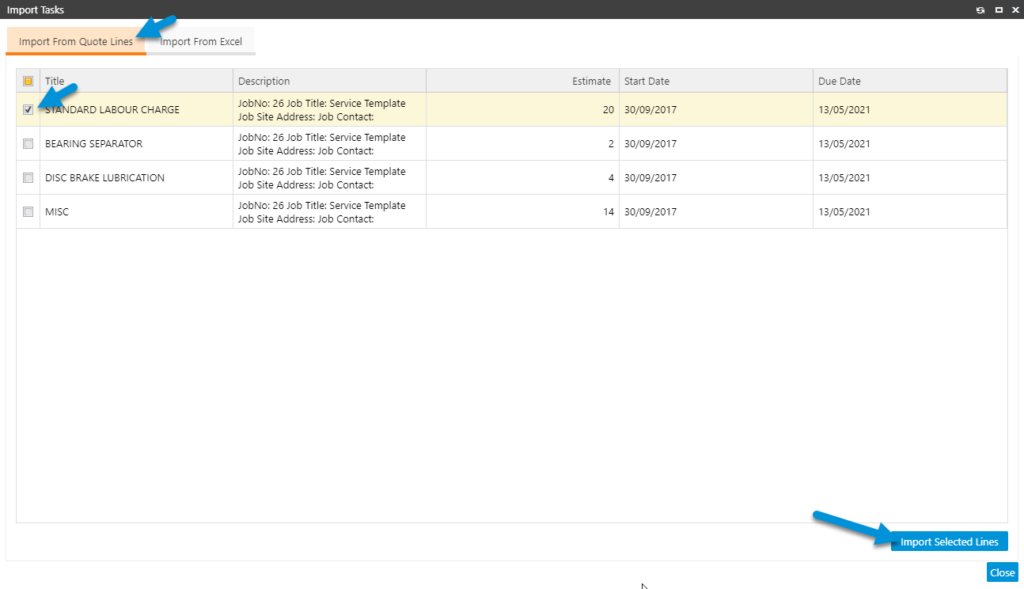
There is the option to import tasks via quote lines where users can select the quote lines they would like to be tasks then click Import Selected Lines, as per below:
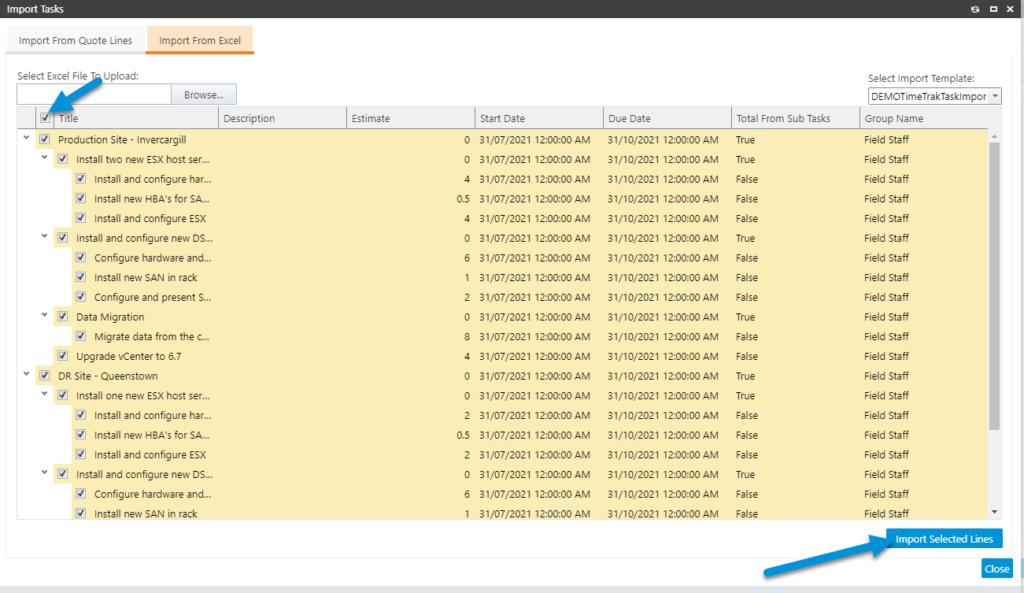
Or go to the Import from Excel tab.
If there is import files loaded into the Admin Console, these can be accessed via the Select Import Template option below, which will download the template to the users PC in order to be altered and then uploaded via the browse button.

Once imported the tasks will display on screen to be reviewed (see below) where users can select all and Import Selected Lines.
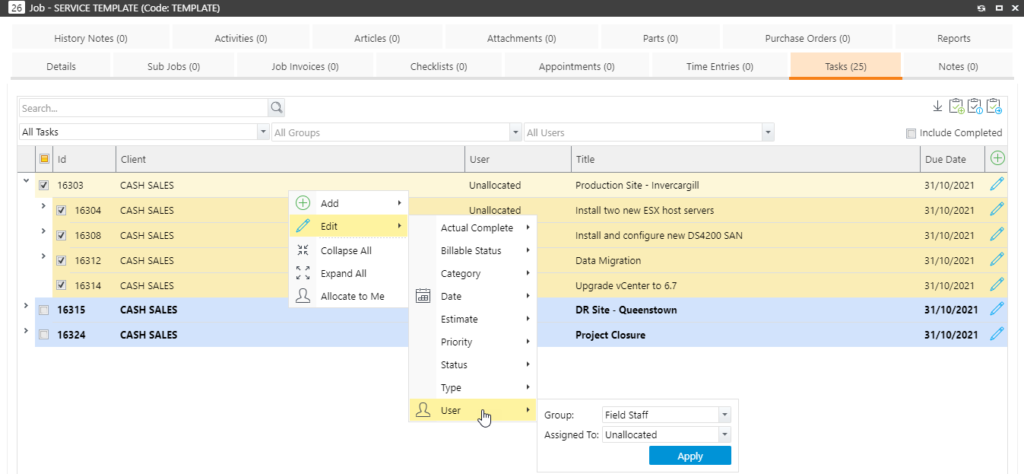
Tasks will be imported against the job where users can select one or multiple tasks and right click to update information against the task such as user or task type etc.
If you have any further questions, please contact the TimeTrak team via email: support@timetrak.benandhayley.nz or
phone NZ: 0800 120099 AU: 1800 6080 77