Need to add a new user to EziView? This Tip of the week will take you through the step by step process.
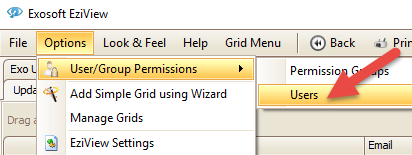
Open EziView, as per below:
- Options
- User/Group Permissions
- Users
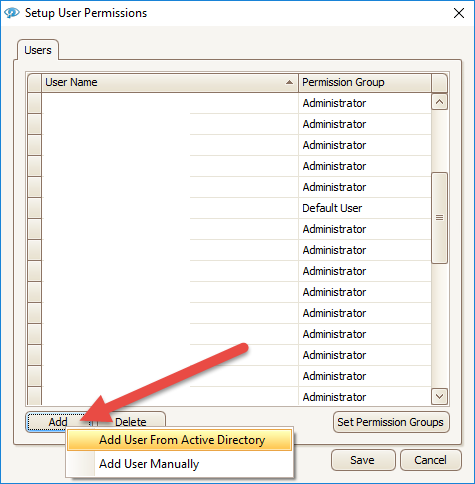
EziView works via windows authentication, if possible select ‘Add user from active directory’ as per the below screen shot
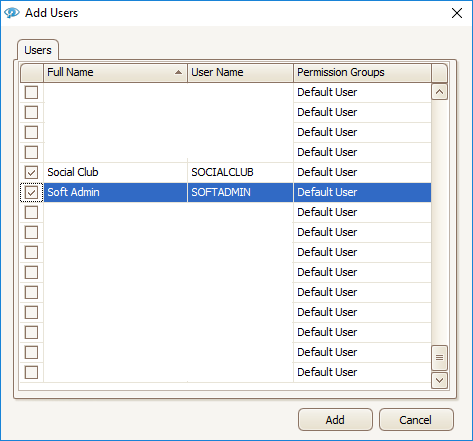
This will display a list of users from your active directory as per below example, tick the users you wish to add.
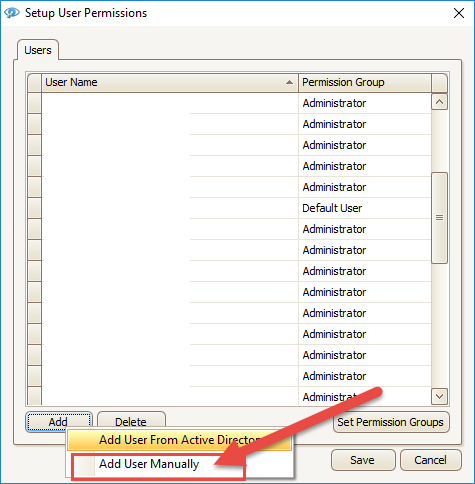
If this option is not available for you or there is no users in the list, select “Add users manually” as per below:
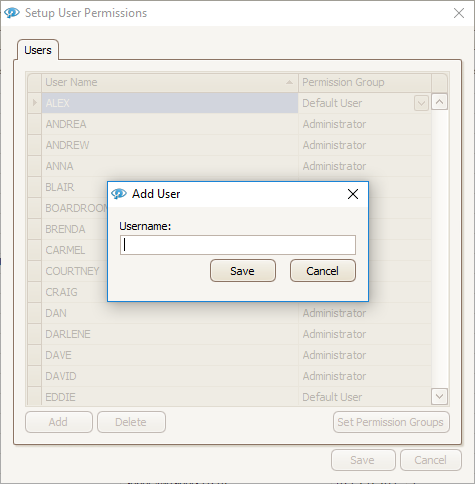
Below will appear, type the users window authentication username (what they login to the network with) and click save:
You can then select the permission group required for the new user from the permission group drop down as per below:
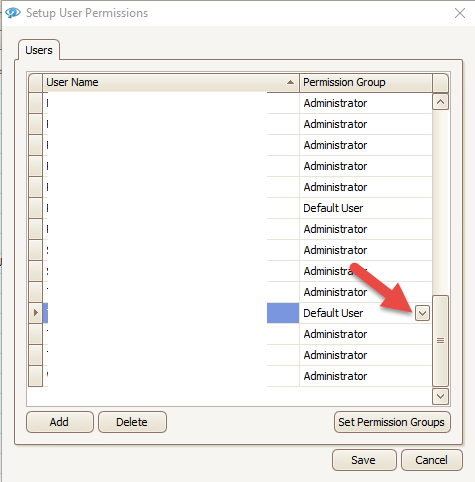
These permission groups can be reviewed/ altered by clicking ‘Set Permission Groups’ as per below:

If you have any further questions please contact the TimeTrak team via email: support@timetrak.benandhayley.nz or phone NZ: 0800 12 00 99 AU: 1800 60 80 77