Contents
1.Introduction
Project Plan is the process of defining, preparing and coordinating tasks, milestones, resources and dependencies into a comprehensive plan. It serves to inform project stakeholders how the project will be managed, make decisions and deal with project issues.
A typical way to create a project plan is to use a work breakdown structure (WBS), a technique for splitting tasks into sub-tasks and creating a task hierarchy. Gantt Charts are used to reflect the project hierarchy.
Adopting project management best practices, TimeTrak version 20.1 is now featuring project management add-ons such as WBS through Gantt Charts, master job – sub job and tasks, sub-tasks structure, project milestones and dependencies. Additionally, our new workload planning board provides you with a visual representation of the teams’ capacity and individual workload, allowing you to manage the project teams effectively.
2.Best Practices
- Define the project calendar. Define the project start date, end date and deadline dates (optional in TimeTrak 20.1).
- Identify project resources.
- Set project milestones.
- Identify task dependencies, risks and constraints.
- Make final adjustments to the project plan. Once the project has started, inspect it at regular intervals to detect potential problems or scheduling conflicts and make any corrections required.
- Once the project has started, inspect it at regular intervals to detect potential problems or scheduling conflicts and make any corrections required.
3.Project Structure in TimeTrak 20.1
TimeTrak 20.1 defines the project components as per below.
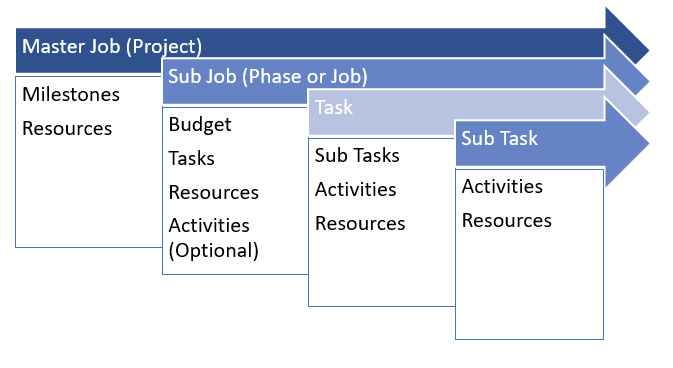
Project Structure in TimeTrak 20.1

TimeTrak 20.1 Master-job, Sub-job, Tasks and Sub-tasks
The term master-job is synonymous with the project in TimeTrak 20.1. The master job serves as the primary setup and is used for grouping purposes to include all sub-job activity performed for a single job. We highly recommend you to follow Master-Job – Sub-Job structure to achieve the best results in TimeTrak projects. It is important to note the below information when you create projects in TimeTrak 20.1.
- Follow Master-Job and Sub-Job structure to achieve the best results. Only one layer of master + sub-jobs is supported.
- Define the project calendar. Define the project start date & end date in the master-job & sub-job levels.
- Add project budgets either to master-job level or sub-job level. Not Both.
- The master job cannot be set to ‘Complete’ while any of its sub-jobs are still open. Likewise, sub-jobs cannot be reopened until its master job is also reopened.
- It is recommended to add project budgets either in the project (master-job) or sub-job level.
3.1 Add a Project (Master Job)
Important: TimeTrak 20.1 only considers jobs with option “Project Managed” ticked on as a master job.
Add a new Job (Master Job) – Select Project Managed – Set Start & Due Dates.
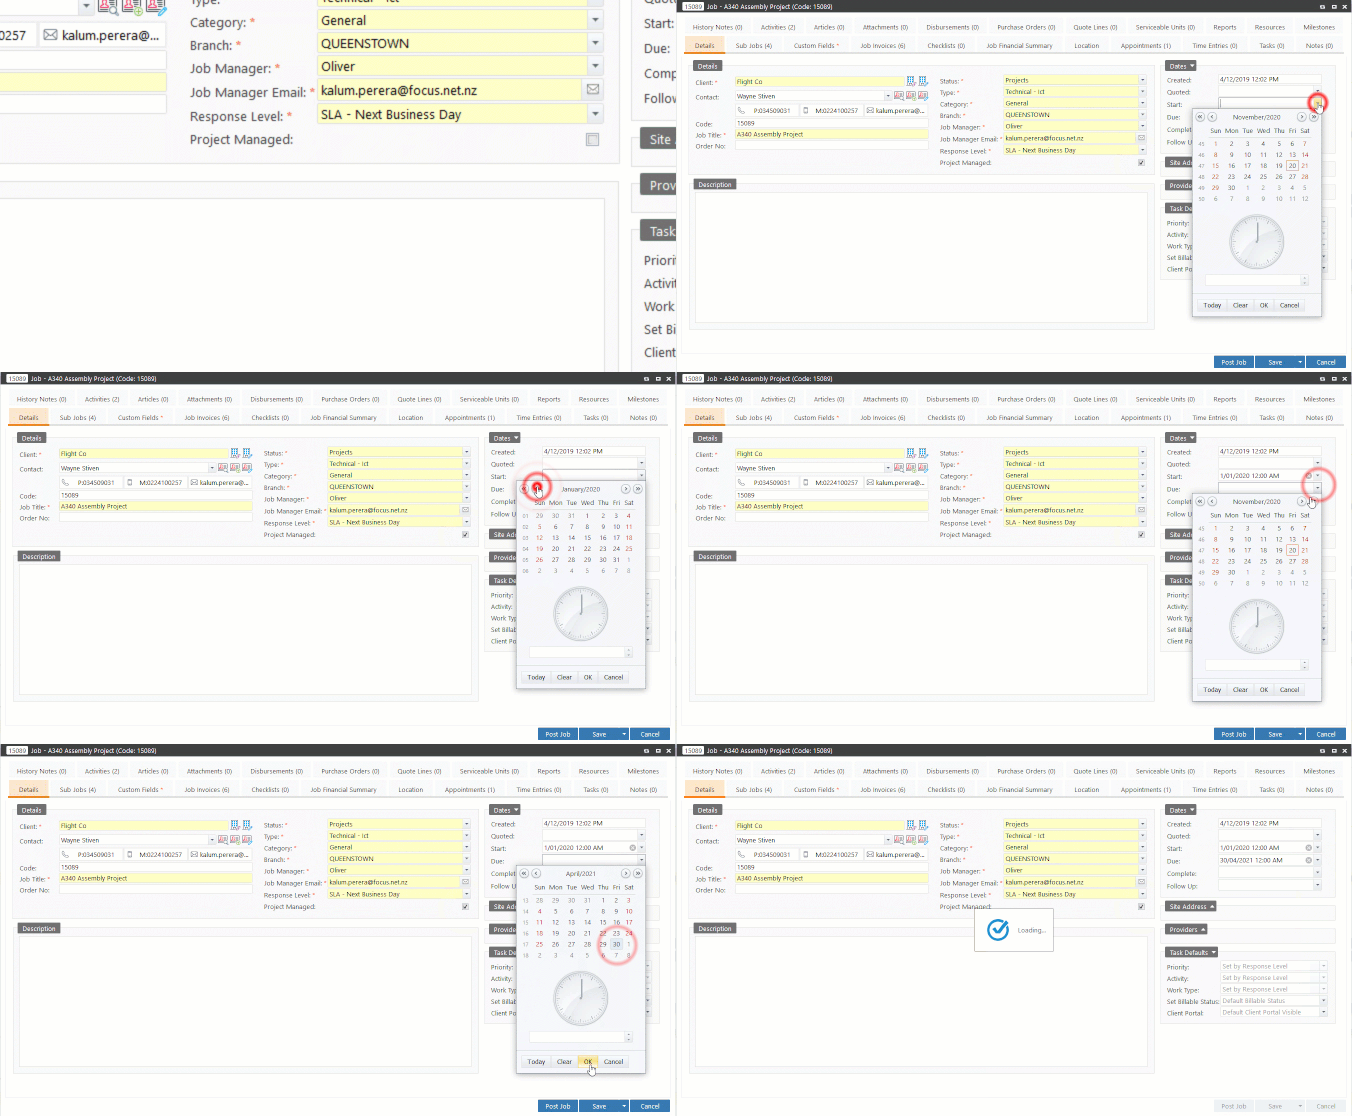
3.2 Add Project Resources
This feature will allow you to assign project resources (people or equipment) to sub-jobs, tasks and sub-tasks. Only the master job has the resources tab. Once project resources are selected, they will flow through to sub-jobs, tasks and sub-tasks. As a result, TimeTrak workload management features will be enabled.

3.3 Project Milestones
Milestones act as signposts through the course of your project. A project milestone is a task with zero duration that shows important achievements. They represent a clear sequence of events that incrementally build up until your project is complete.
Project milestones can be added to the master-job as per below.
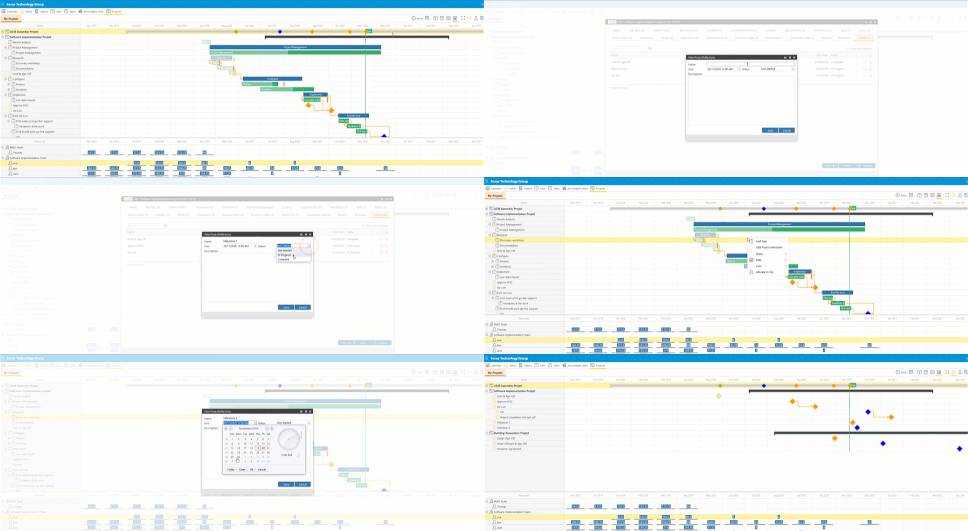
3.4 Add Sub-Job(s)
Typically, a sub-job is considered as a project phase. You can add multiple sub-jobs based on project requirements.
Important: Sub-job start date, due date and job manager are essential attributes for projects.
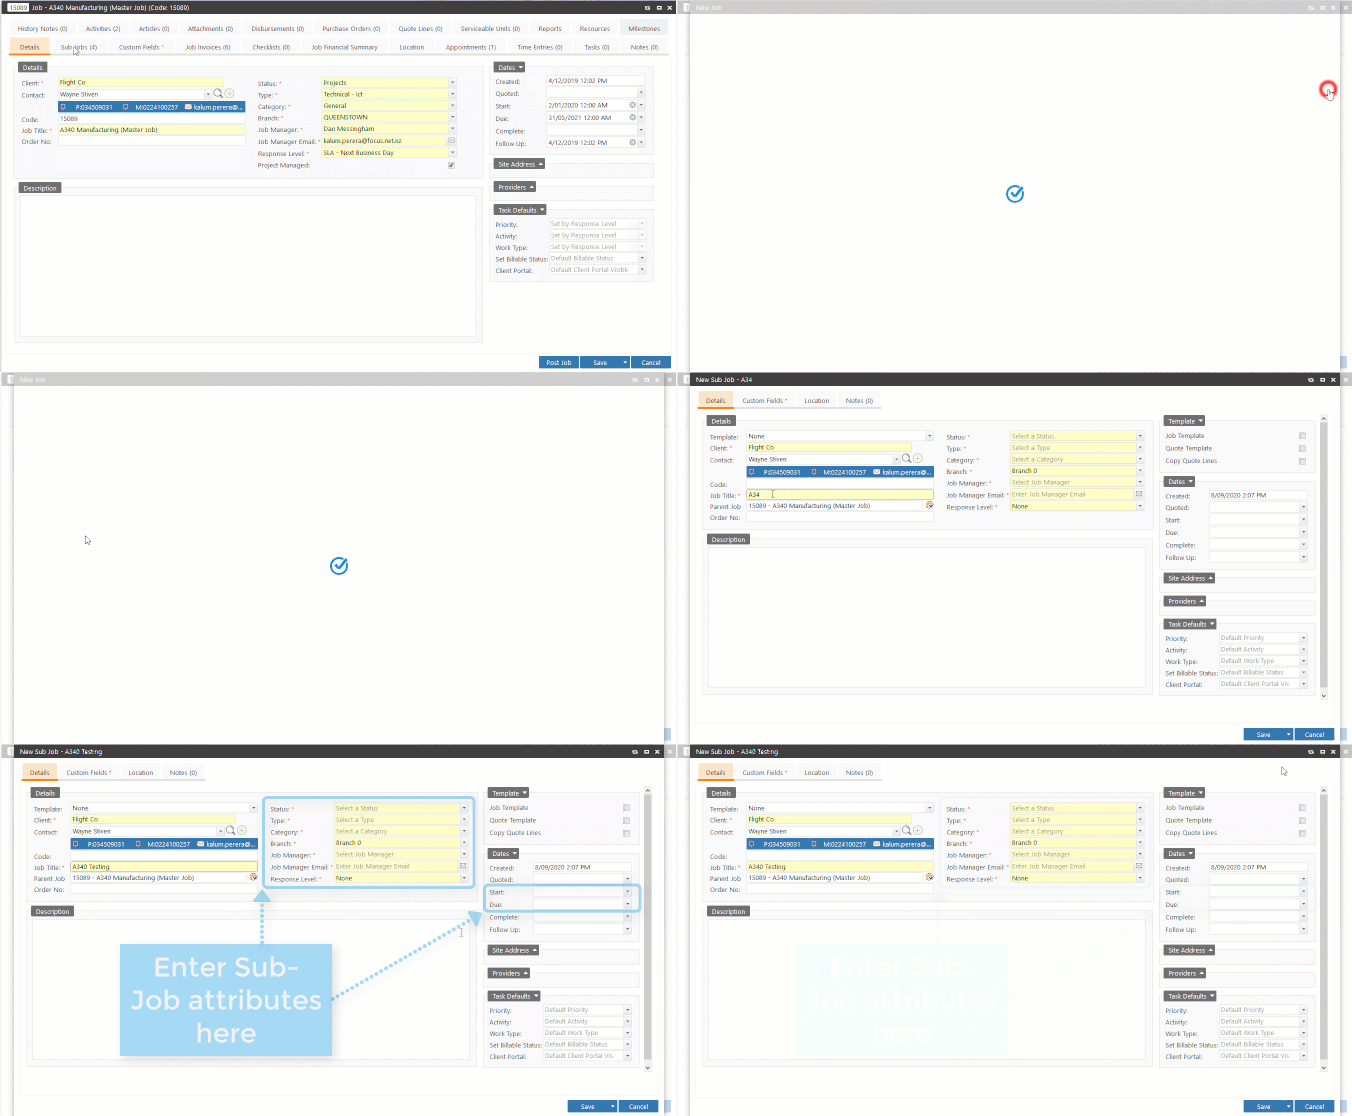
All related sub-jobs are visible under the master-job as per below.
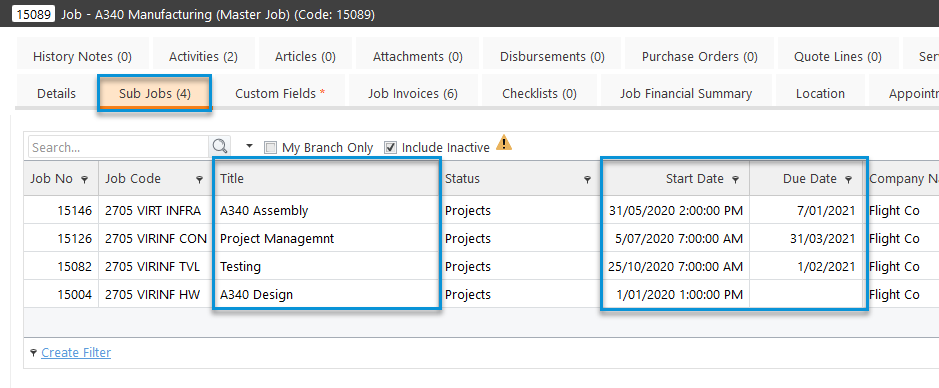
3.5 Add Quote Lines (Project Budget)
Add job quote lines (budget) either to master-job level or sub-job level. Not Both.
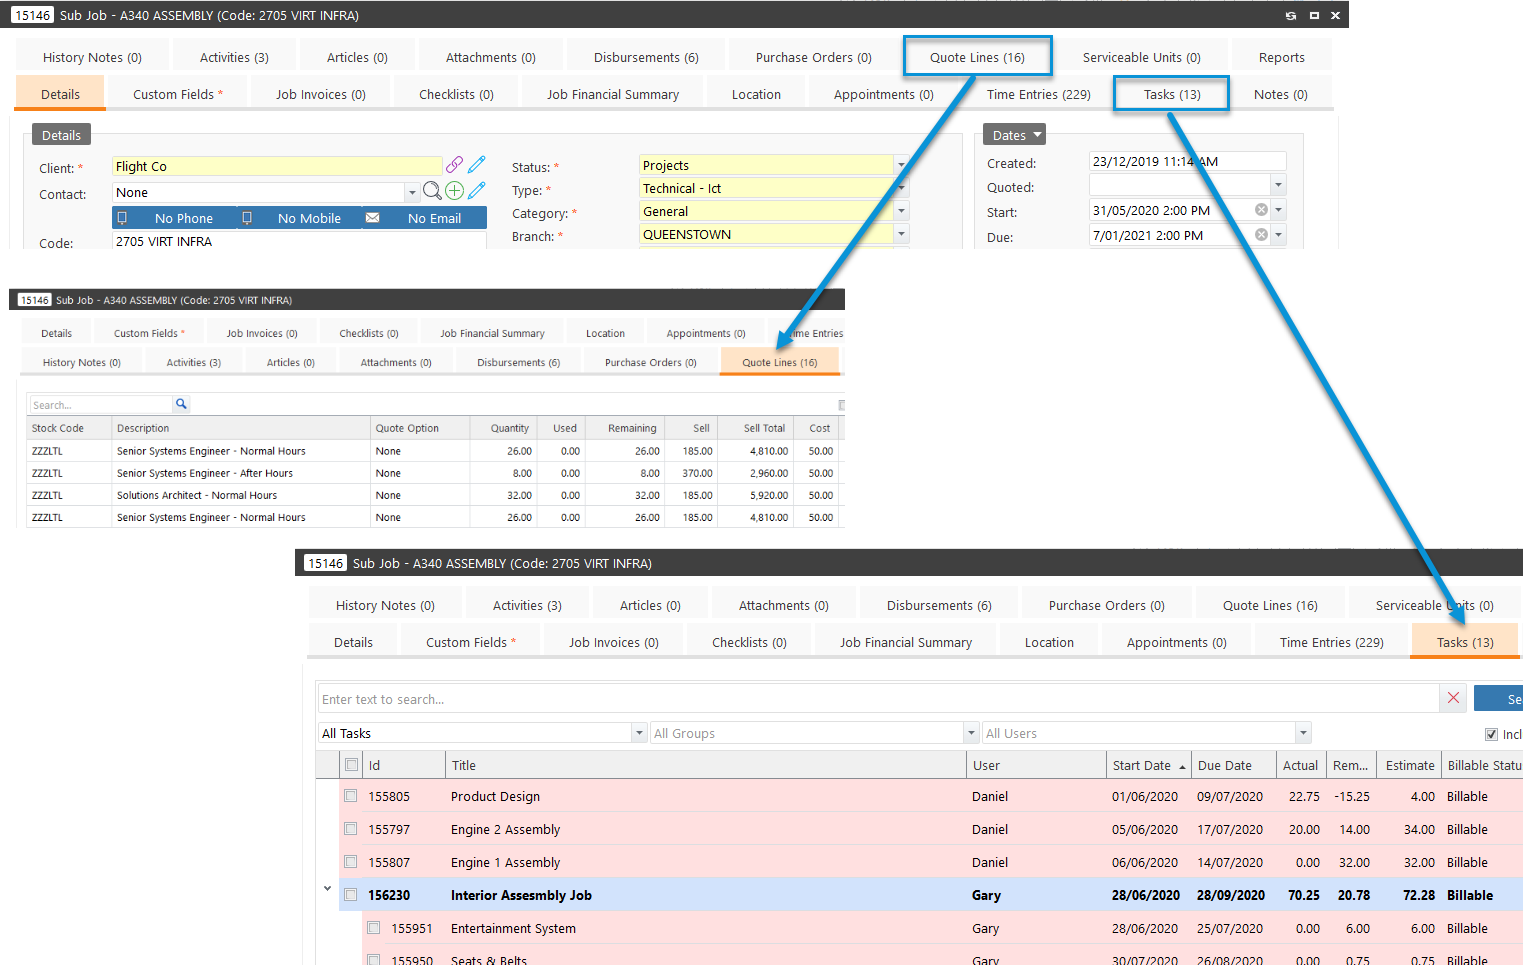
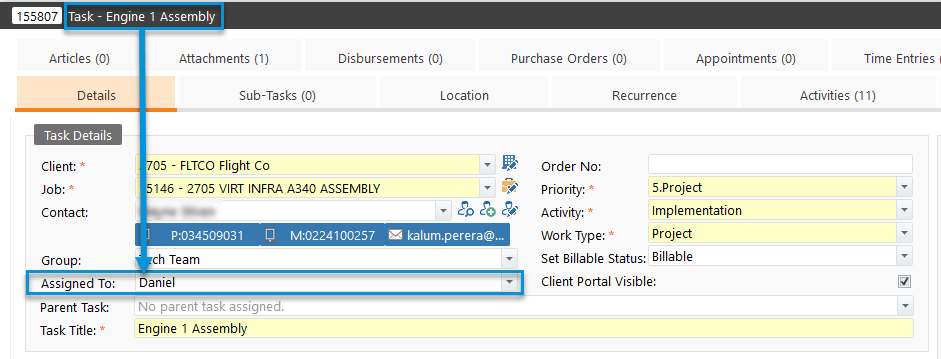
3.6 Assign Resources to Tasks
Project resources will flow through to tasks from the master-job. Assign every task to a project resource.
4. Project Scheduling and Gantt Charts
4.1 Introduction
Developing a project schedule is a process of analysing activity sequences, resource requirements, durations and schedule constraints. The three main factors that are considered in the process are duration, task dependencies and constraints. It is important to identify those factors at the planning stage.
A Gantt Chart is a project management tool assisting in the planning and scheduling of projects of all sizes, although they are particularly useful for simplifying complex projects.
4.2 TimeTrak 20.1 Gantt Chart Features
- Visual and colour-coded view of the project progress.
- Project dependencies and milestones.
- Multiple workspace and multiple projects view.
- Start, end deadline dates and status when hovering over a job or task.
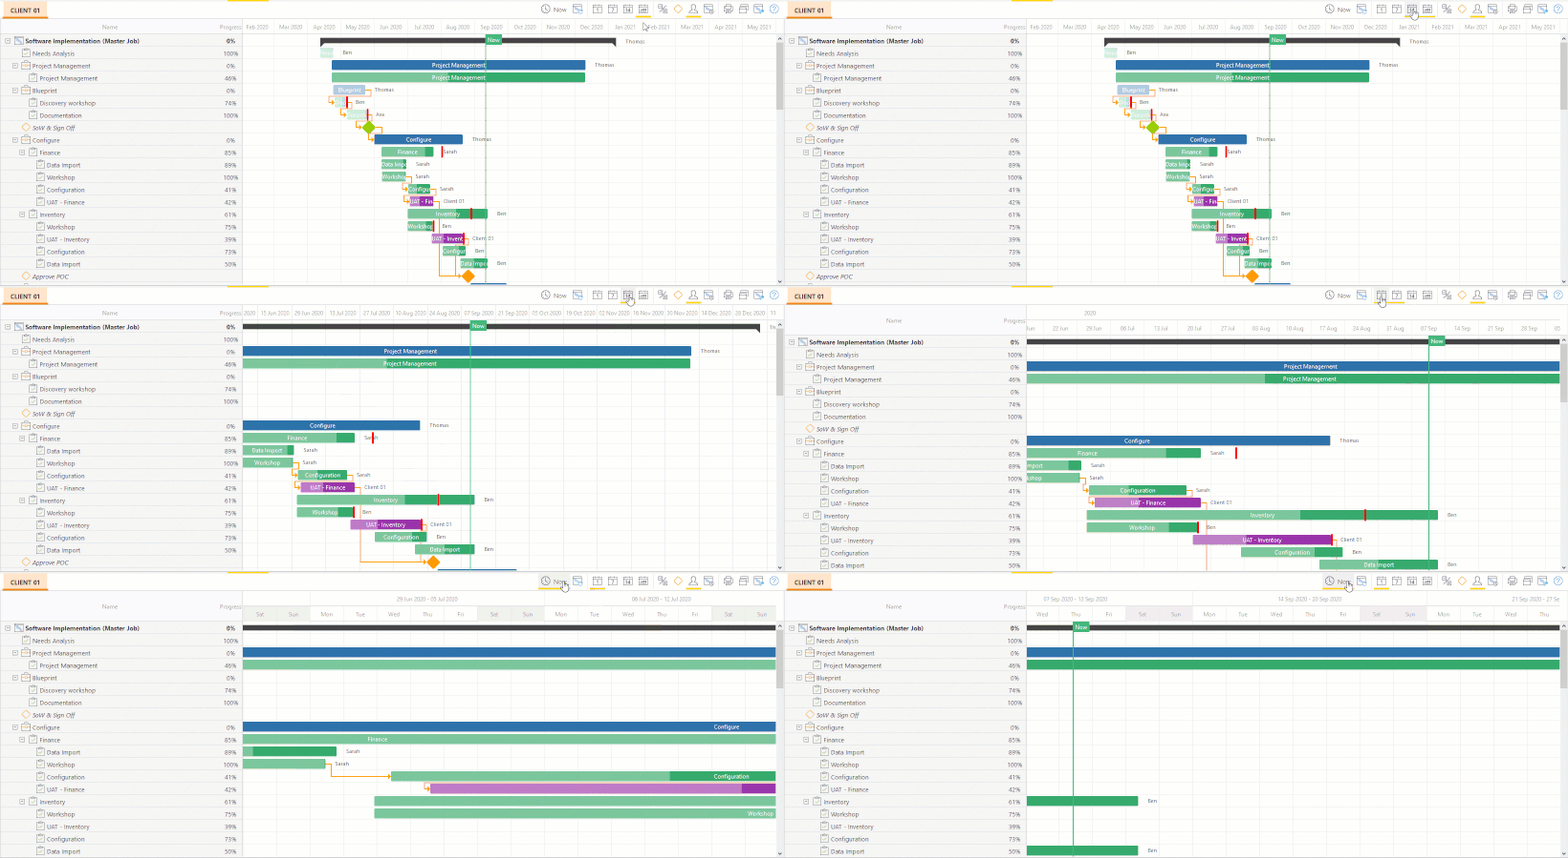
- Timeline view – timeline runs horizontally across the top of the Gantt Chart and shows the month, week, day views. A vertical green line that highlights the current date on the Gantt Chart.
- Client tasks.
- Resource workload planning and management.
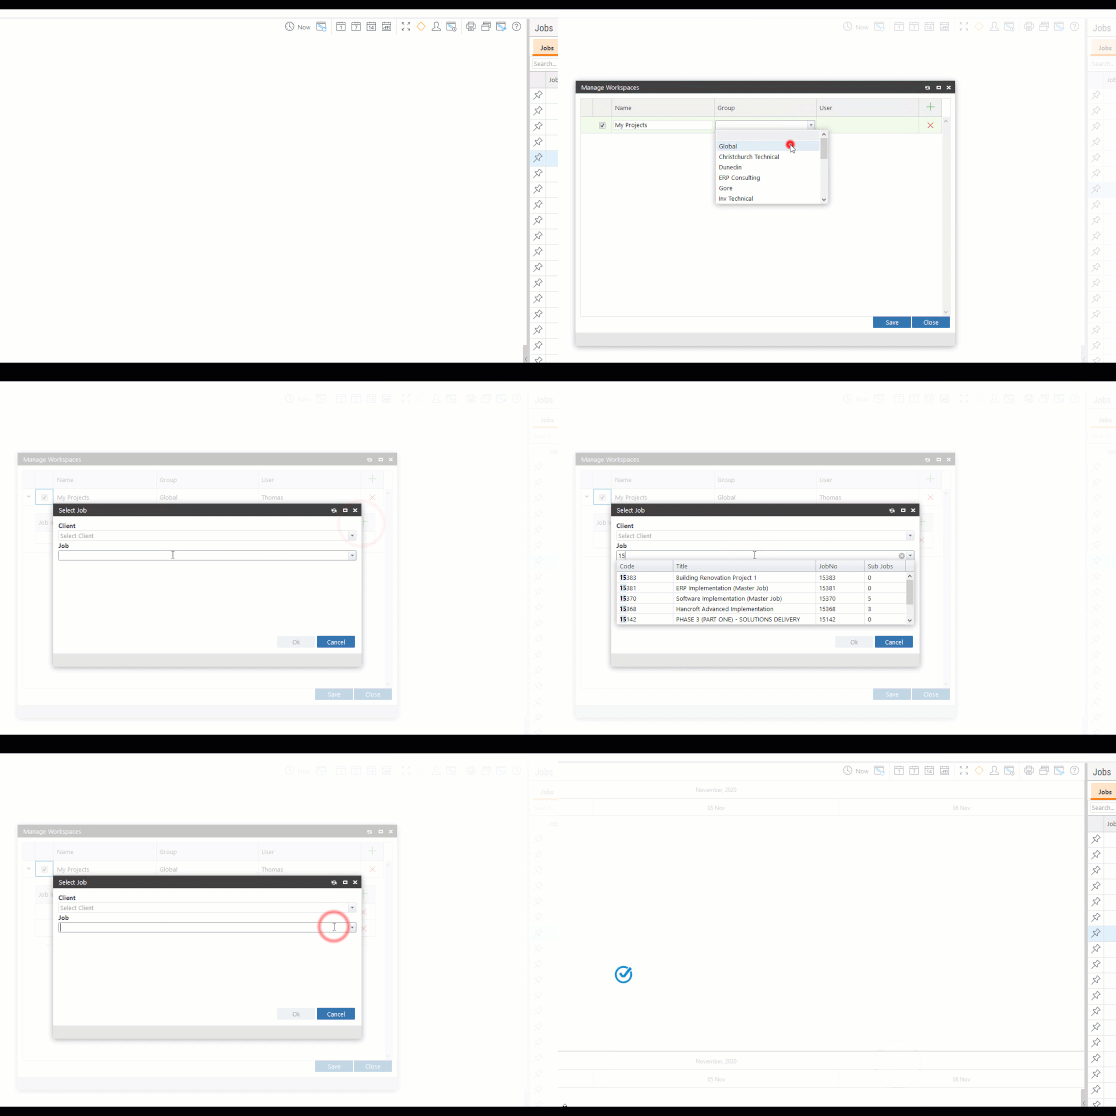
To view your projects, pin “Projects” to the header menu bar in TimeTrak 20.1.
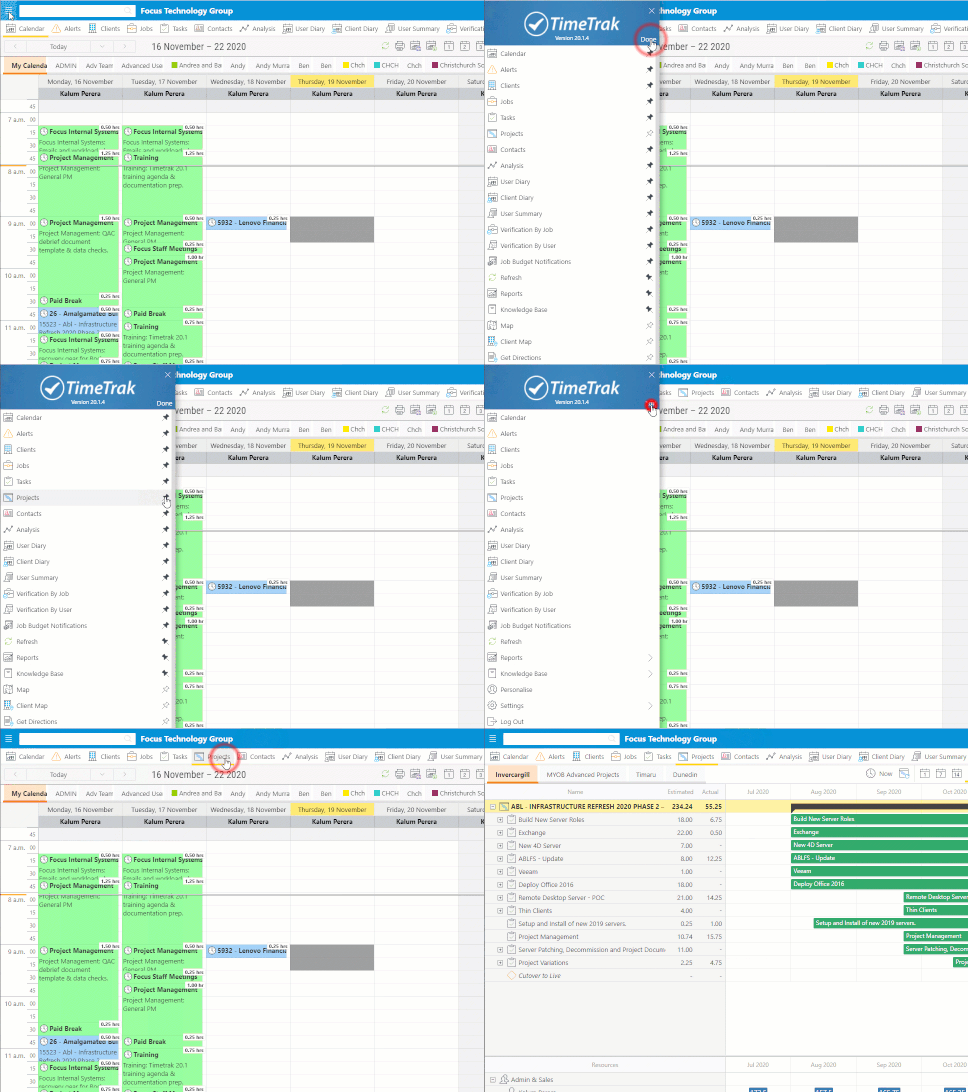
Click on Manage Workspace and add all master-jobs to your preferred workspace as illustrated below.
4.2.1 Legend
Legend contains descriptions of each item and related colour codes.

4.2.2 Sub-Jobs and Tasks
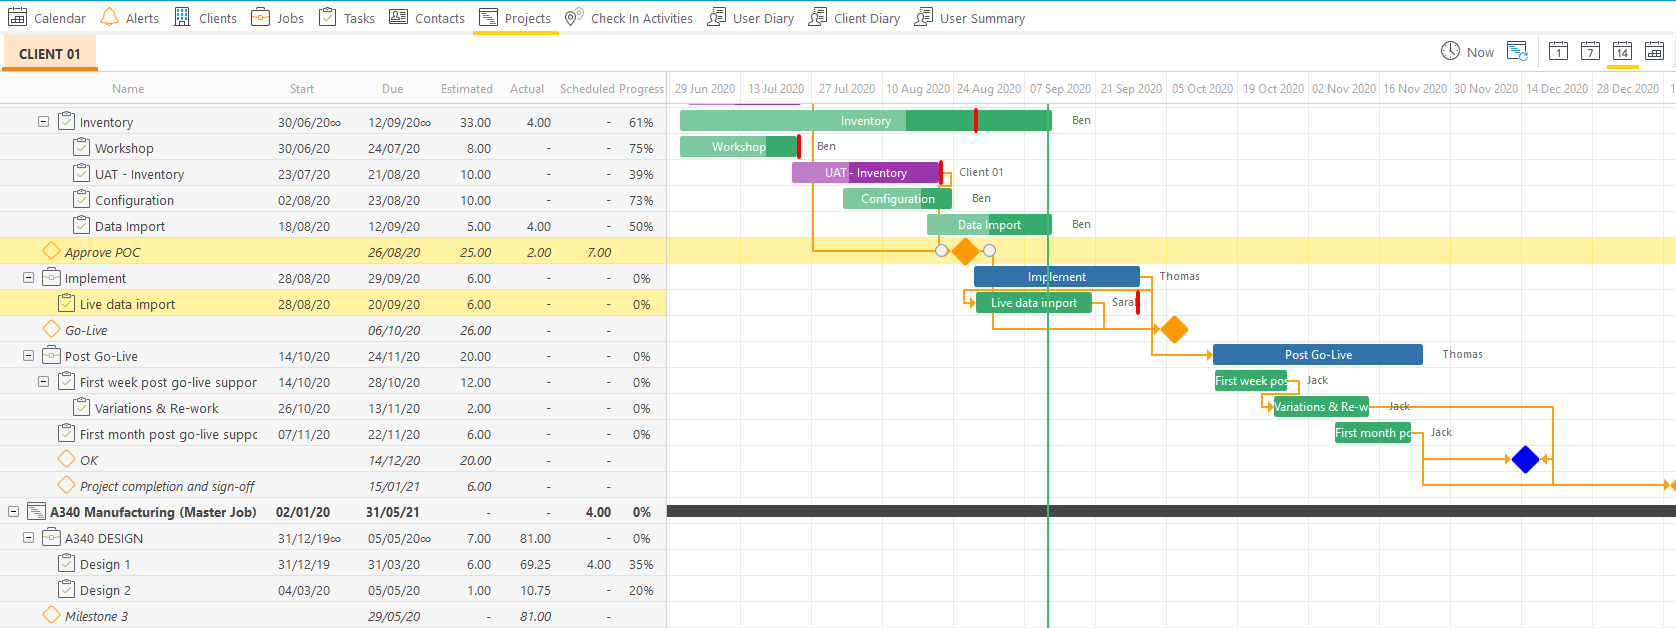
Horizontal bars of the Gantt Chart that represent sub-jobs (blue), tasks (green) and sub-tasks (green). As you extend the start or end dates, the bars on the Gantt Chart changes accordingly.
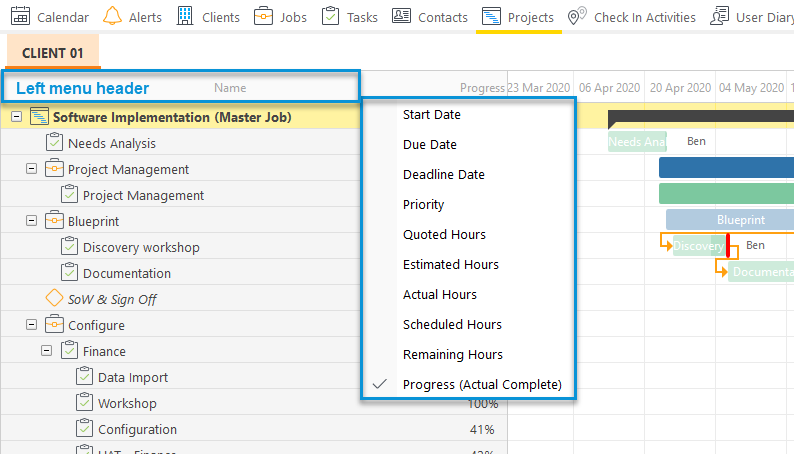
Sub-job & task details are shown on the left side of the Gantt Chart, enabling you to select your preferred settings with a single right-click on the left header bar.
4.2.3 Gantt Chart Details
TimeTrak Gantt Chart has multiple views to manage projects.
Expand, collapse projects and view milestones of multiple projects.
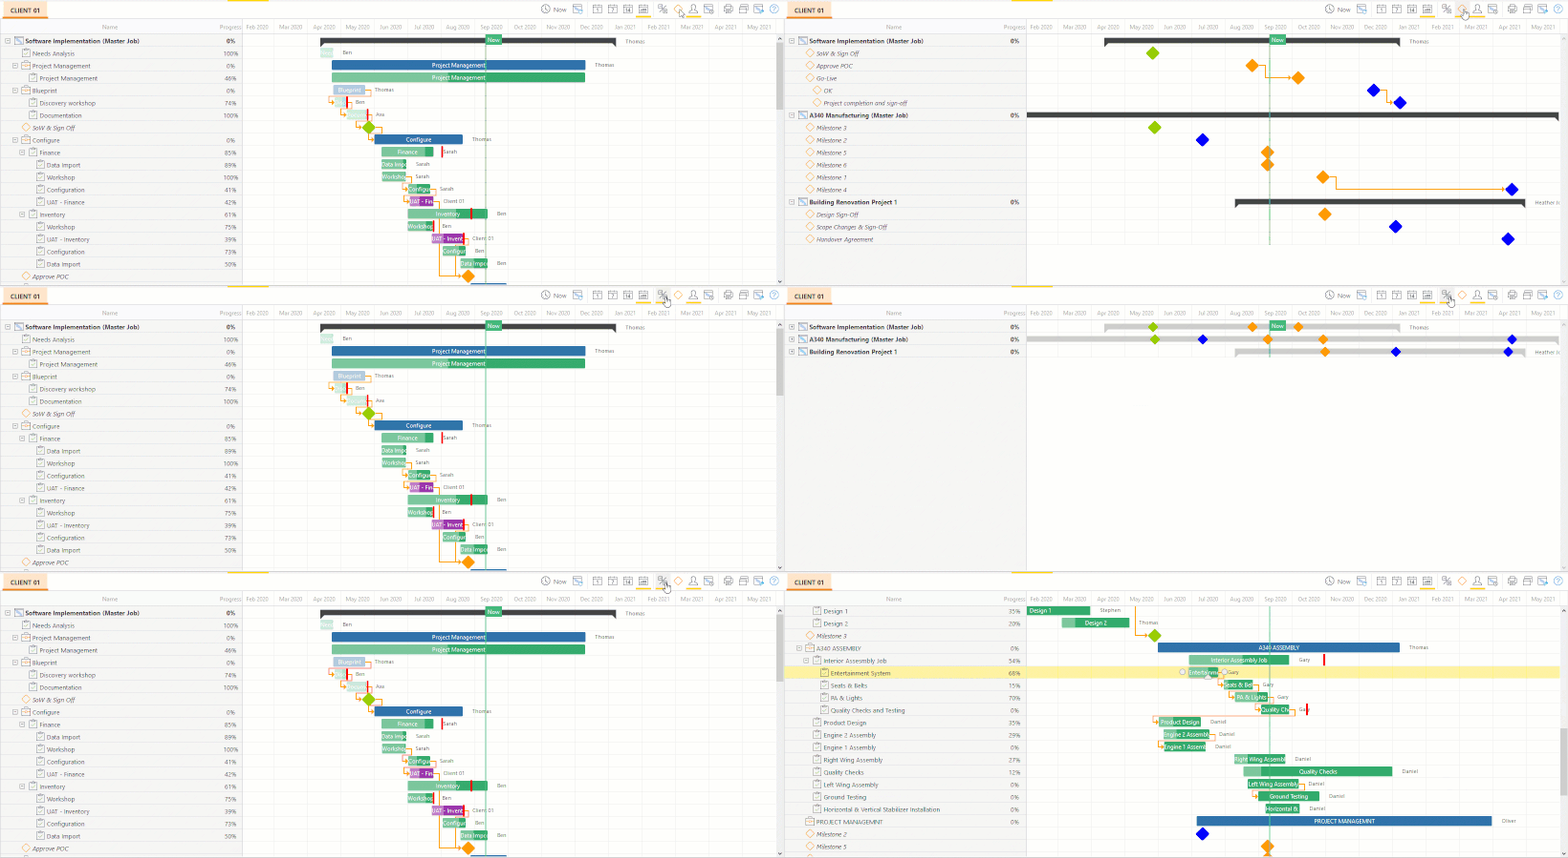
In TimeTrak, the Gantt Chart feature has an ability to view only project milestones by clicking the Diamond Icon on the menu bar.

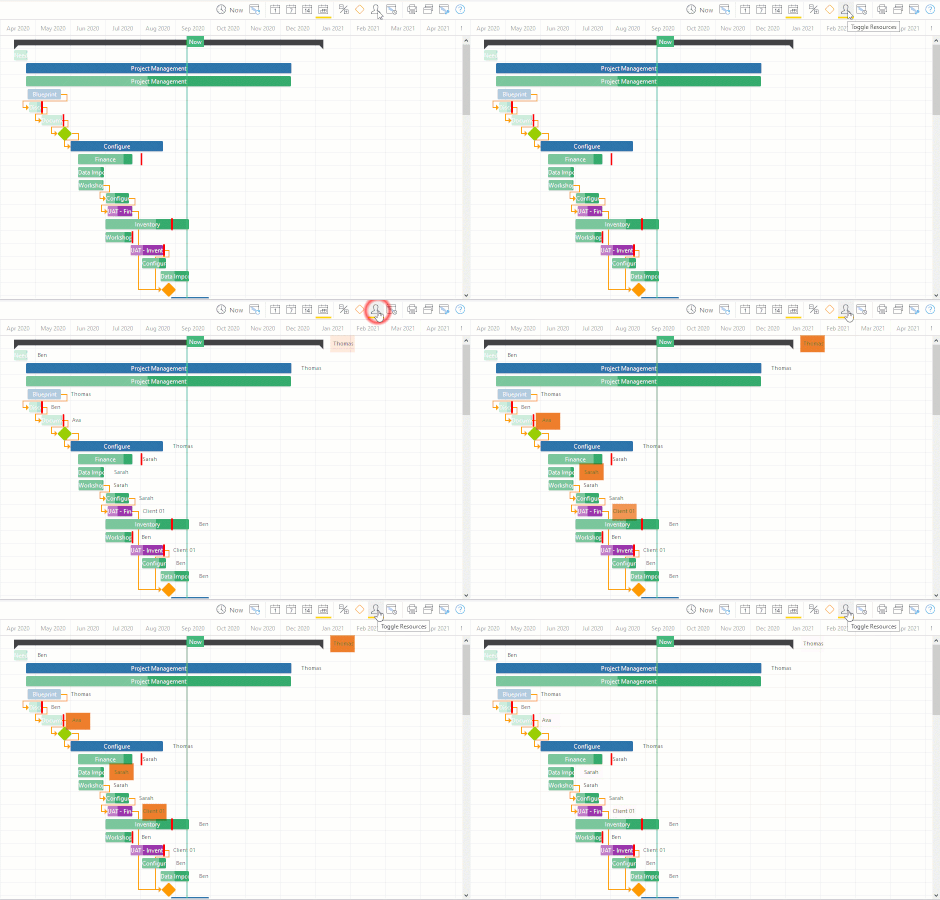
View resources – simply click “Toggle Resources” Icon to view their names. Client tasks are shown in purple colour.
4.2.4 Task Dependencies
Project plans normally require tasks to be performed in a specific order. By default, tasks are linked in a ‘Finish to Start’ relationship (dependency), which means that the first task you select (the predecessor task) must end before the next task you select (the successor task) can start. This is typically represented on the Gantt Chart by lines with arrowheads joining each task to its successor.
Task dependencies are represented in yellow arrows as per the below screenshot in TimeTrak 20.1.
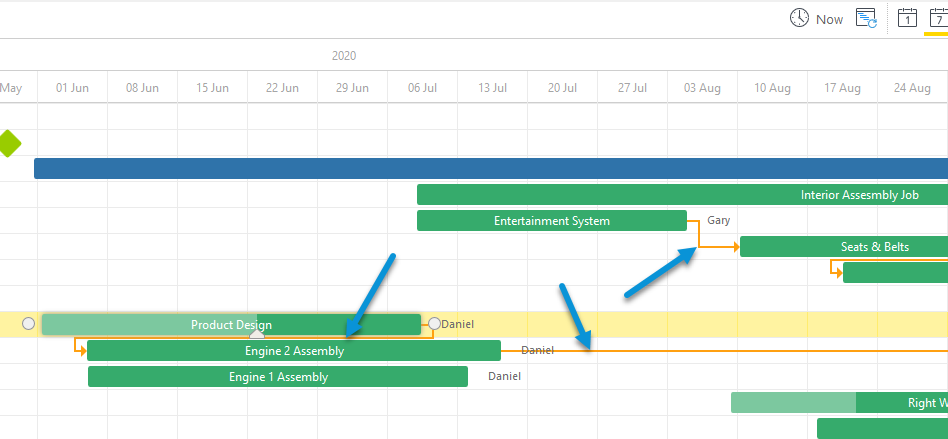
Typically, in a ‘Finish to Start’ relationship, the arrowhead points to the start date of the dependant task. This is different for ‘Finish to Finish’ and the arrowhead is pointed to the end date of the dependant task.
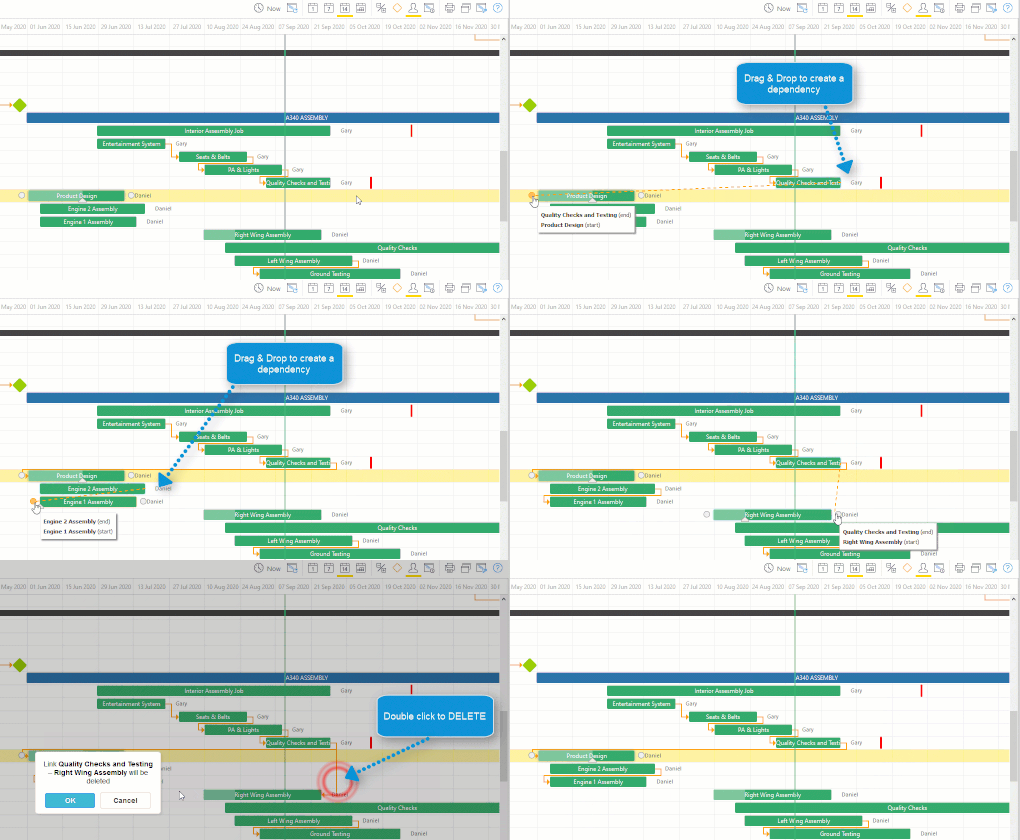
Add or delete task dependencies
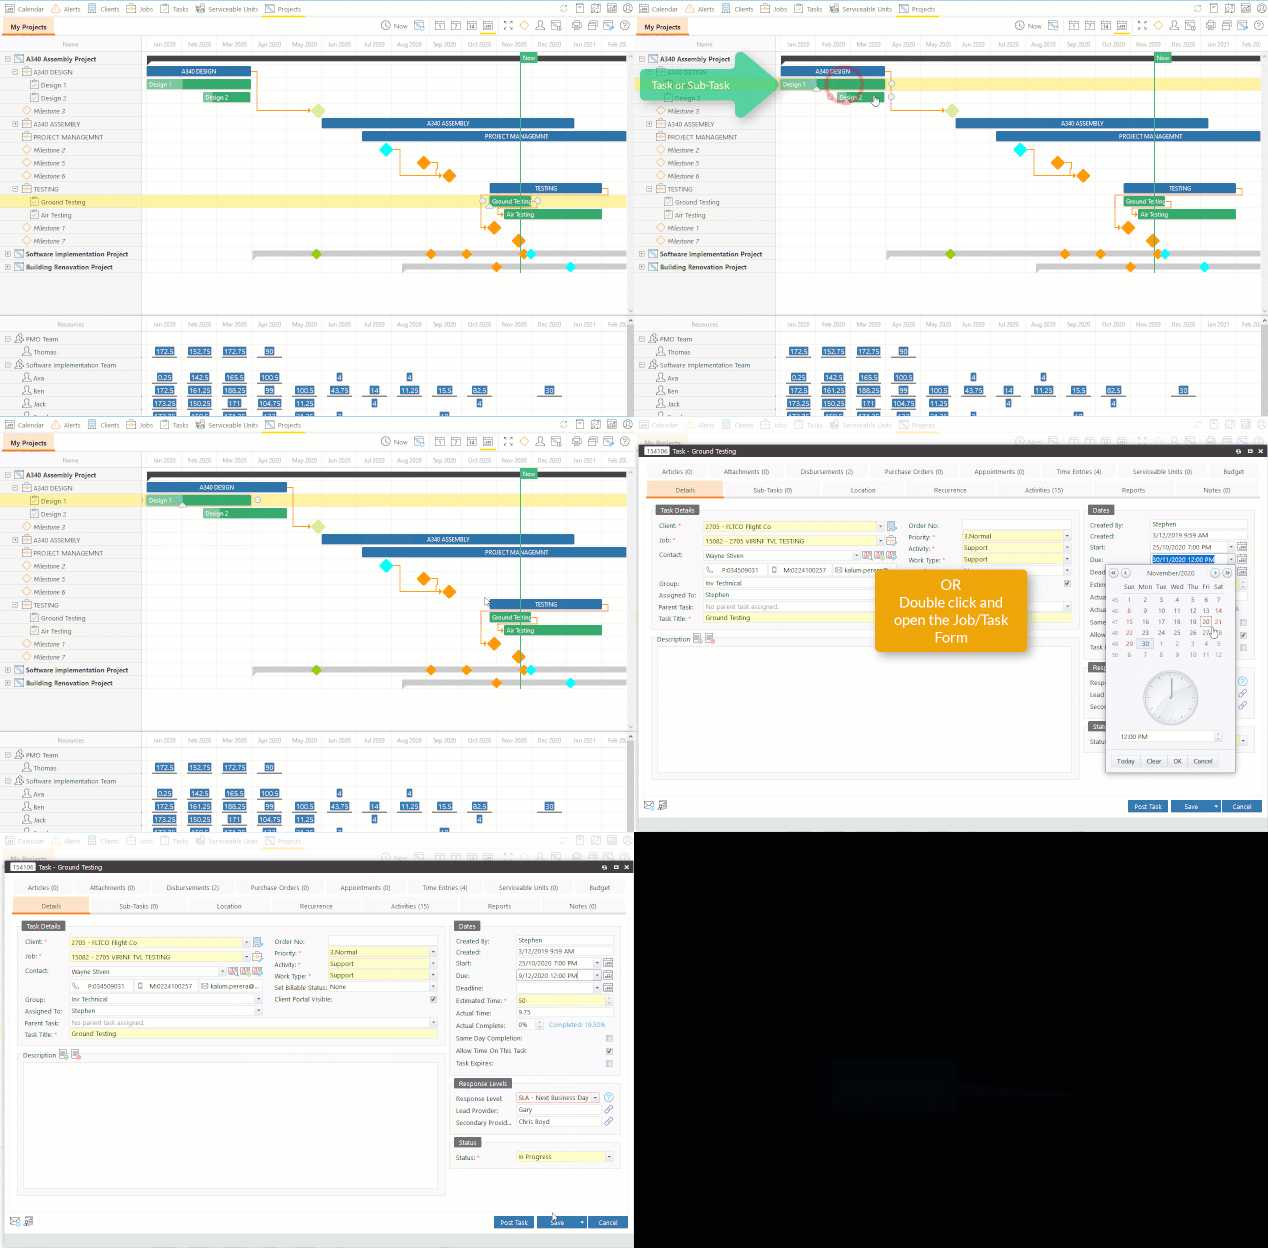
Please refer below illustration to add and delete dependencies in TimeTrak 20.1.
Progress Monitoring
Monitoring the project progress involves keeping track of lots of moving parts. Actual task progress monitoring is a key component of the project setup. You can see a graphical representation of tasks’ actual competition featured in Time Trak 20.1. This allows end-users to update the task progress without having to open individual tasks.
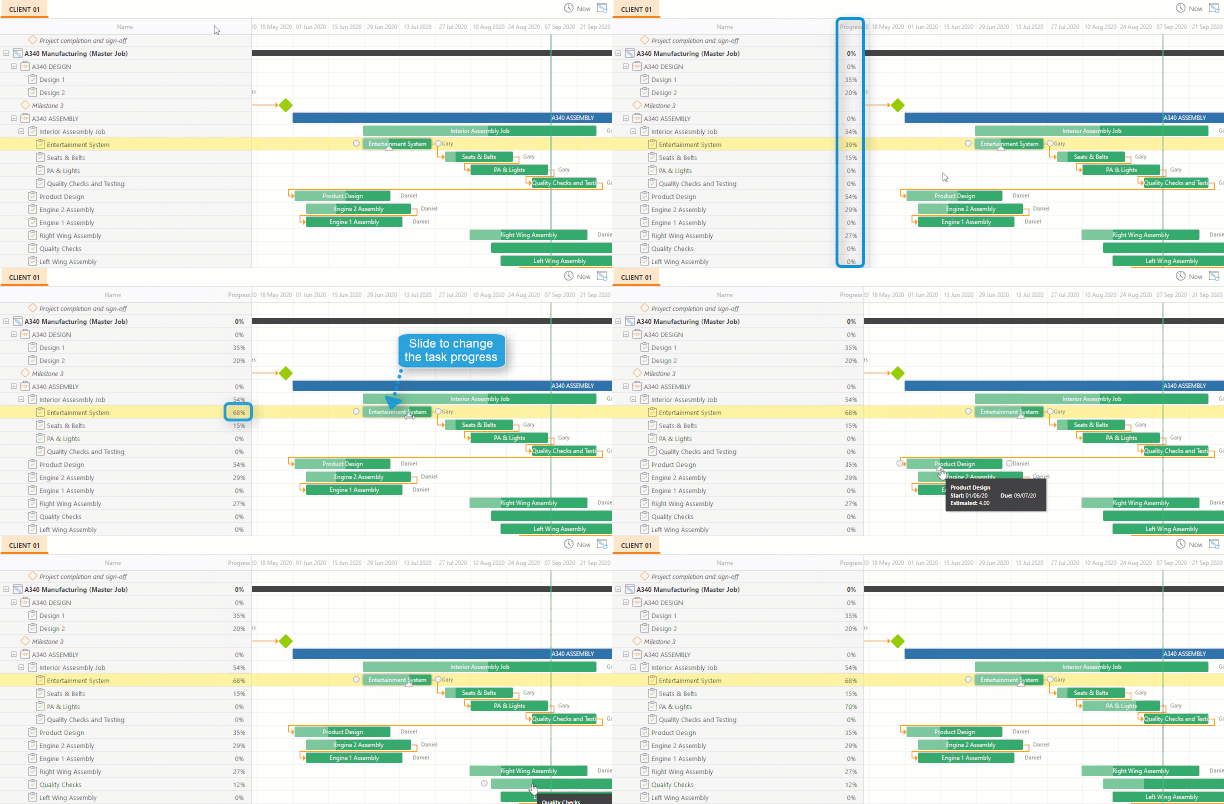
Sub-Jobs, Tasks & Due Date Changes – As you extend the start or end dates, the bars on the Gantt Chart changes accordingly.
Pro Tip: Beware of tasks that stay at 80% complete for too long. This is a sign that the task owner doesn’t know how much work there is still to do. When you ask for updates, the percentage complete should move up each time unless no work has genuinely taken place. Monitoring percentage complete is a good way to get an early warning about tasks that might run late.
Deadline Date
If you have a task deadline date, you can see below that the task cannot be moved beyond the deadline date.

4.2.5 TimeTrak 20.1 Admin Settings
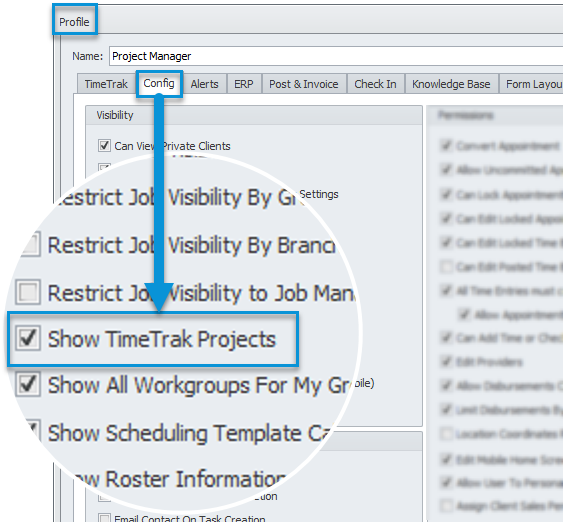
Open TimeTrak Admin Console and tick “Show TimeTrak Projects” in the user’s profile.
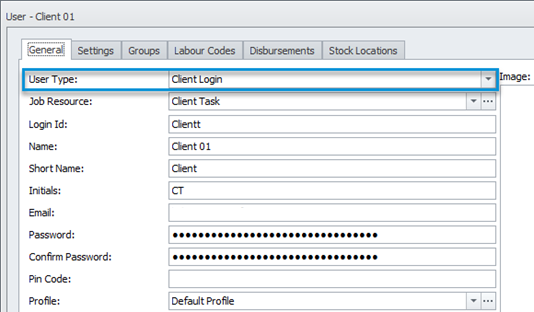
Ensure Client user type is “Client Login”.
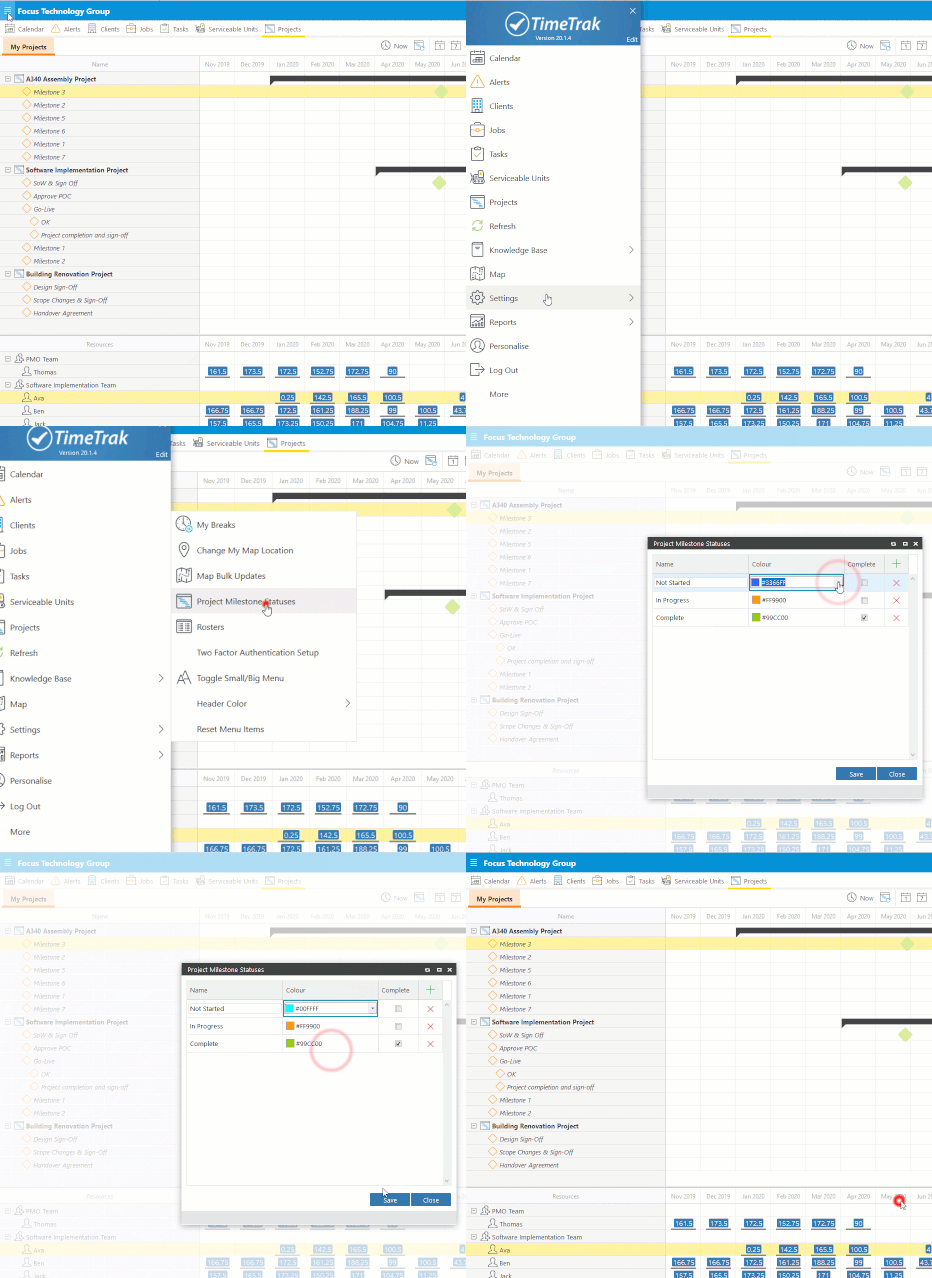
Milestone colours are customisable.
For any questions or queries, email support@timetrak.benandhayley.nz or call NZ: 0800 12 0099 | AUS: 1800 60 80 77