One of the hardest things to do today is to consolidate an organisation’s knowledge and make it available in a way that assists all team members. TimeTrak Knowledge Base is available in TimeTrak Professional and TimeTrak Mobile, meaning that users can access information while out in the field.
There are almost unlimited uses for a Knowledge Base.
A Knowledge Base can be a question and answer forum, allowing team members to share their experiences and solutions with one another. A Knowledge Base can be a repository of organised documentation, contain Sales and Marketing information, tools for those in Field and Customer Service and store HR information.
When used properly a Knowledge Base can be an excellent tool for cataloging information, enabling and increasing collaboration, managing data, and assisting in self-learning.
The purpose of this whitepaper is to demonstrate how to enable and set up a Knowledge Base in TimeTrak, how to use it in TimeTrak Professional and TimeTrak Mobile, and give real world examples of the benefits.
Setting up a Knowledge Base
To be prepared to set up a Knowledge Base, it is a good idea to have noted down what kind of information the Knowledge Base is going to contain and how that information is ordered.
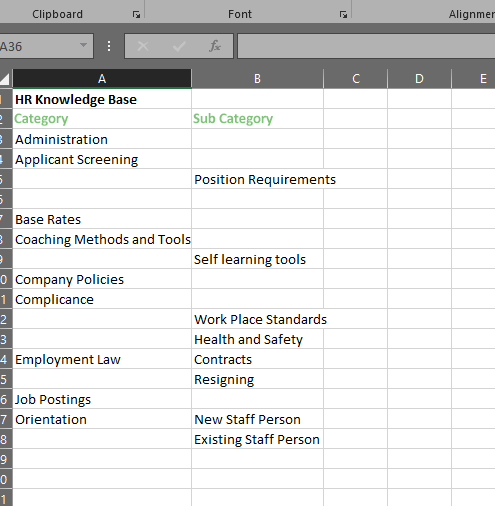
Once you have a structure in place, log in to the TimeTrak Admin Console.
Go to the Knowledge Base menu.
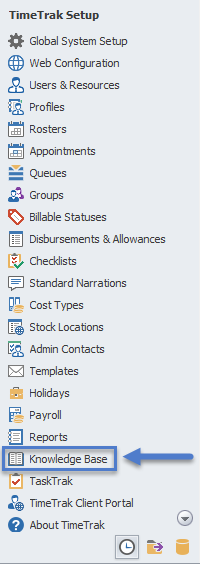
Click on Add to create a new Knowledge Base.
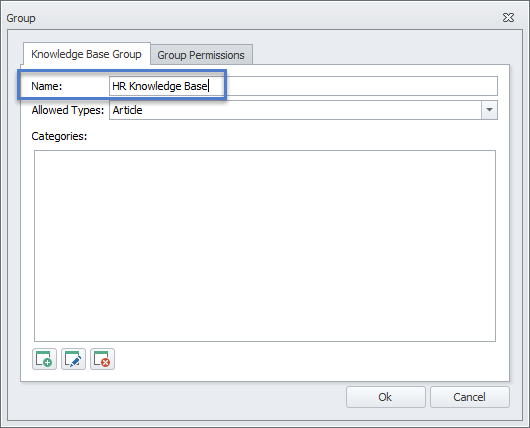
Give the Knowledge Base a meaningful name. This name is what the Link will show in TimeTrak Professional and TimeTrak Mobile to access the information.
Set the Allow Types.
A Knowledge Base can have Articles and Questions.
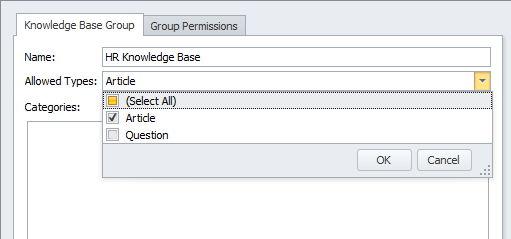
- An Article is designed to contain a specific piece of information. Comments are allowed but often this will be disabled as the information is set and not up for discussion.
- A Question is designed to have answers and team members can vote on the answers until one answer is selected as the solution.
Now set up the Categories and their Sub Categories.
These are the groups for the information that is either an Article and/or Question.
Click on the Plus Icon to create a Category.
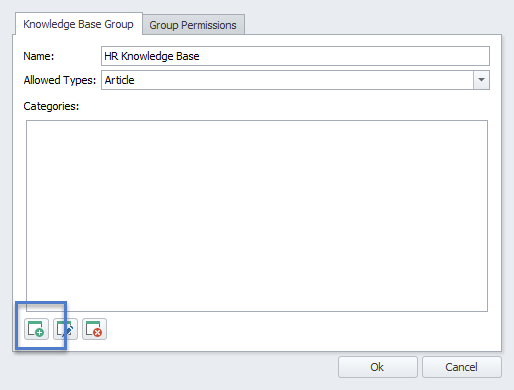
A new pop up will show with the Title of Category.
Enter in the Name of the first Category.
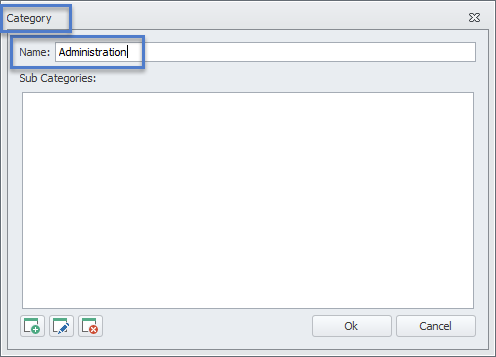
Tip: This screen looks very similar to the Knowledge Base set up screen and to the Sub Category Screen so it is important to read the Title of the screen to make sure you are in the correct place.
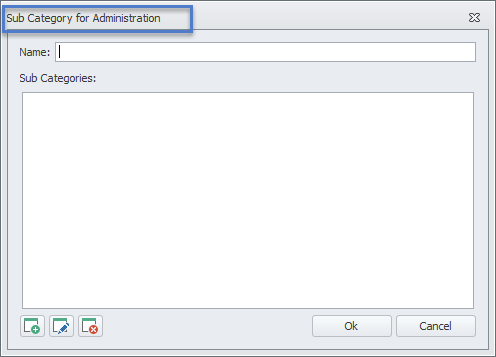
Click OK to save the Category.
A Category can be edited and deleted from the main Knowledge Base Screen.
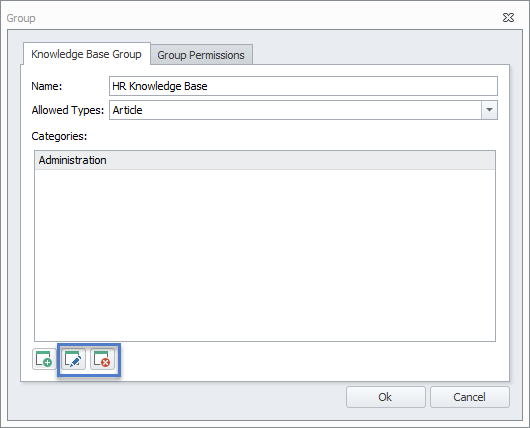
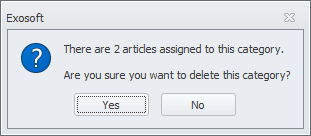
Important: If a Knowledge Base or it’s Categories are deleted then all references to Articles and Questions will be removed from the database and lost. Users will be warned.
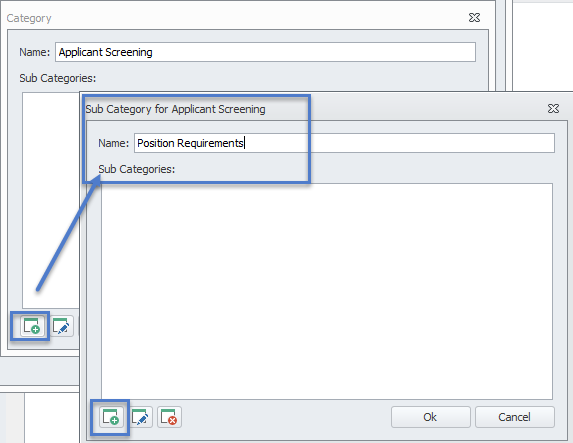
A Category can have a Sub Category and that Sub Category can have a Sub Sub Category and so on.
Best practice is to have three levels of Categories; this keeps the Knowledge Base screens easy to use in TimeTrak Professional and Mobile.
To add the Sub Categories keep clicking on the Plus Icon in each layer of Category.
Knowledge Base Permissions
Permissions for a Knowledge Base are set initially against the Groups.
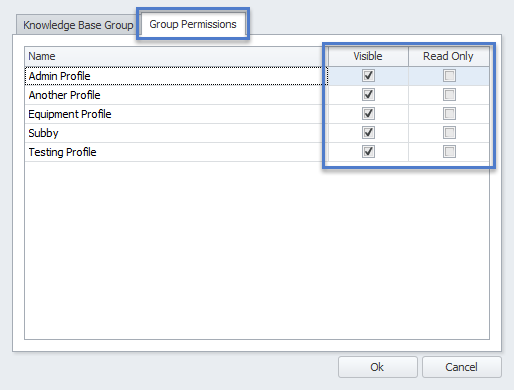
Click on Group Permissions on the Knowledge Base set up screen and update the permissions.
Visibility allows the group’s users to see the Knowledge Base and Read Only prevents users from adding any articles, questions or comments of their own.
Once the Knowledge Base itself has permissions set up then further permissions can be set at the Profile level. This can result in a single user with their own visibility and access to a Knowledge Base that is different from others.
Go into the Profiles Menu > Open a Profile > Click on the Knowledge Base Tab to set the permissions.
- Visibility – allows the group’s users to see the Knowledge Base
- Read Only – prevents users from adding any articles, questions or comments of their own.
- Editable – allows those users allocated to the profile to edit another users article within that Knowledge Base.

The Knowledge Base is now set up and ready for use.
TimeTrak Professional Knowledge Base
Articles and Questions are created in TimeTrak Professional within a Knowledge Base.
Log into TimeTrak Professional.
Just underneath the report selection option, a list of existing Knowledge Bases will show.

Click on a Knowledge Base link to open the Knowledge Base panel.
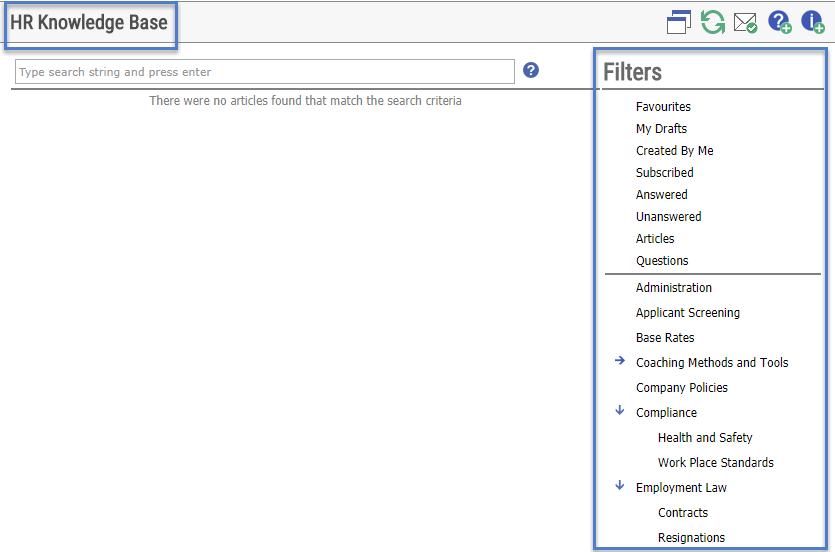
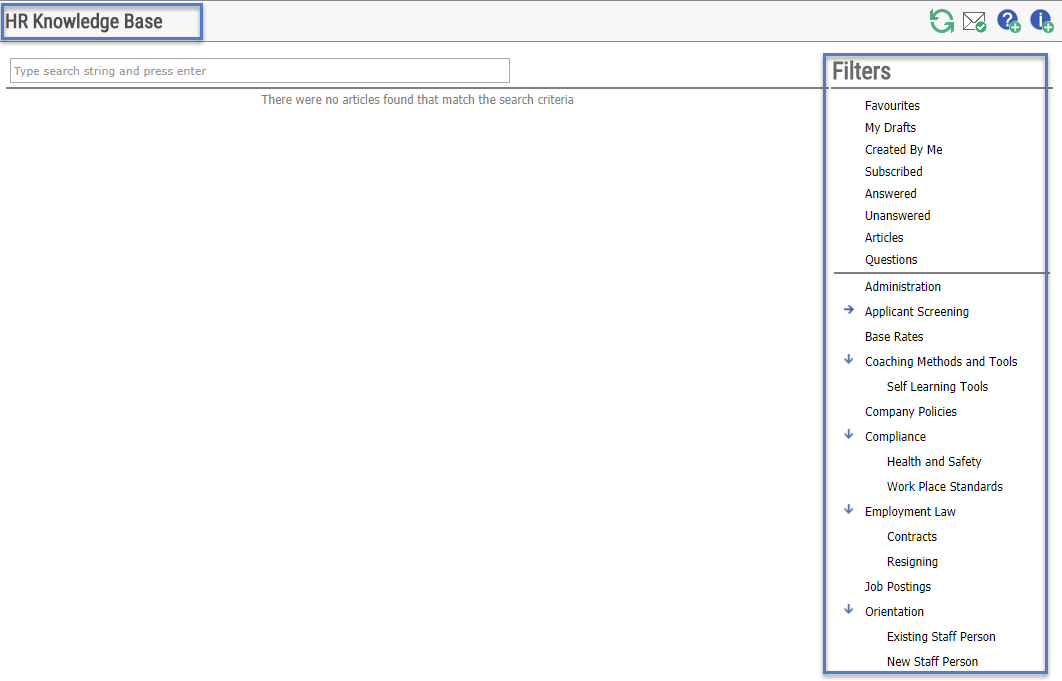
Filters and the Categories will show in a panel on the right side of the Knowledge Base.

Icons:
 Allows the Knowledge Base to be opened in a new window.
 Refresh
 Subscriptions
 Ask a Question
 Create an Article
Ask a Question
Click on the Ask Question Icon

The New Question screen will pop up.
The Details tab is the landing page.
In this screen, the Question will need a meaningful Question Title.
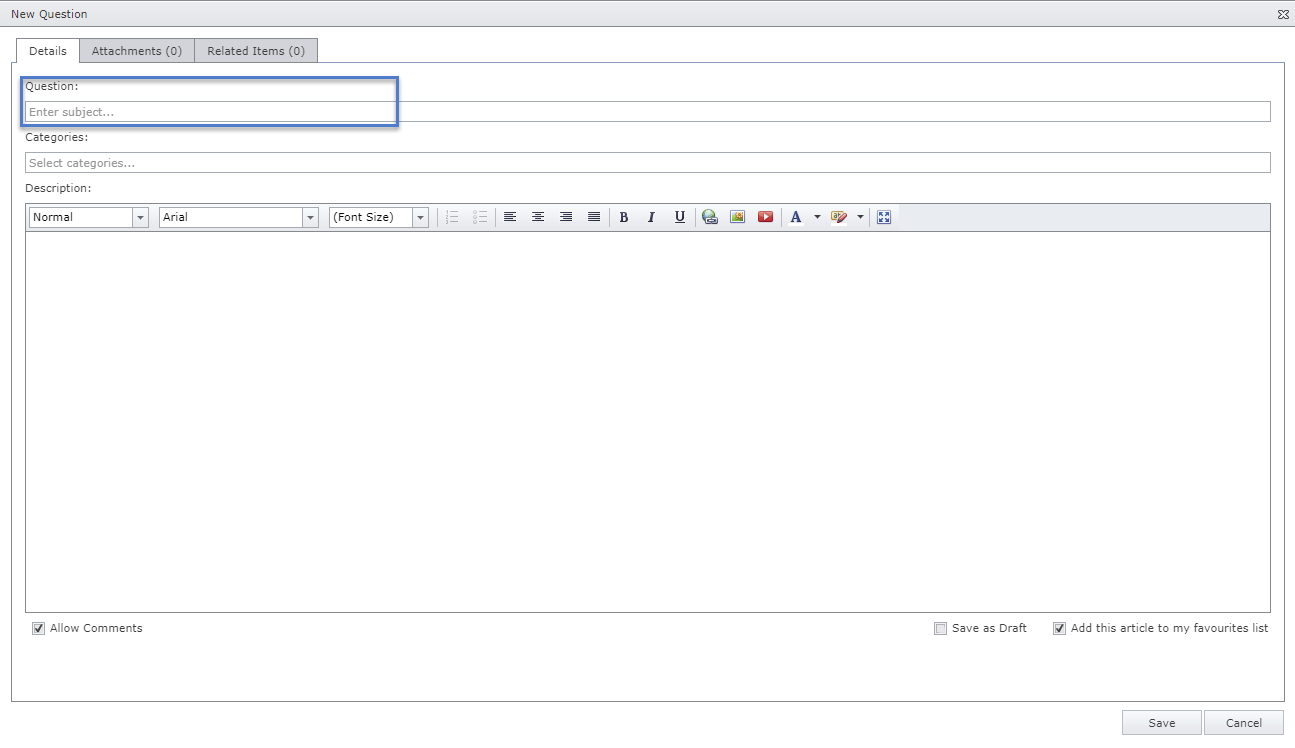
Select at least one Category to assign the Question to.
To do this, click on the Categories Field and a drop down list will appear.
Repeat this to add more than one Category.
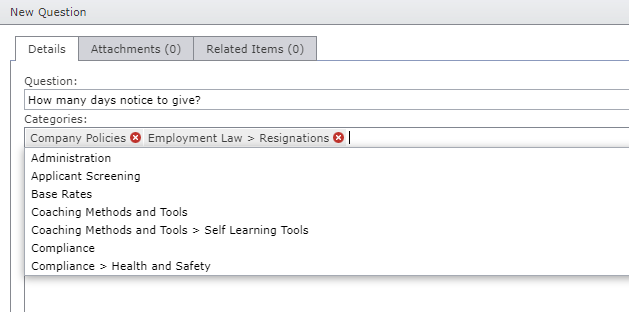
To assign under a Sub Category, these are displayed as “[Category] > [Sub Category]”.

Enter in the Description of the Question.
There is some basic formatting tools for the content of the Question.
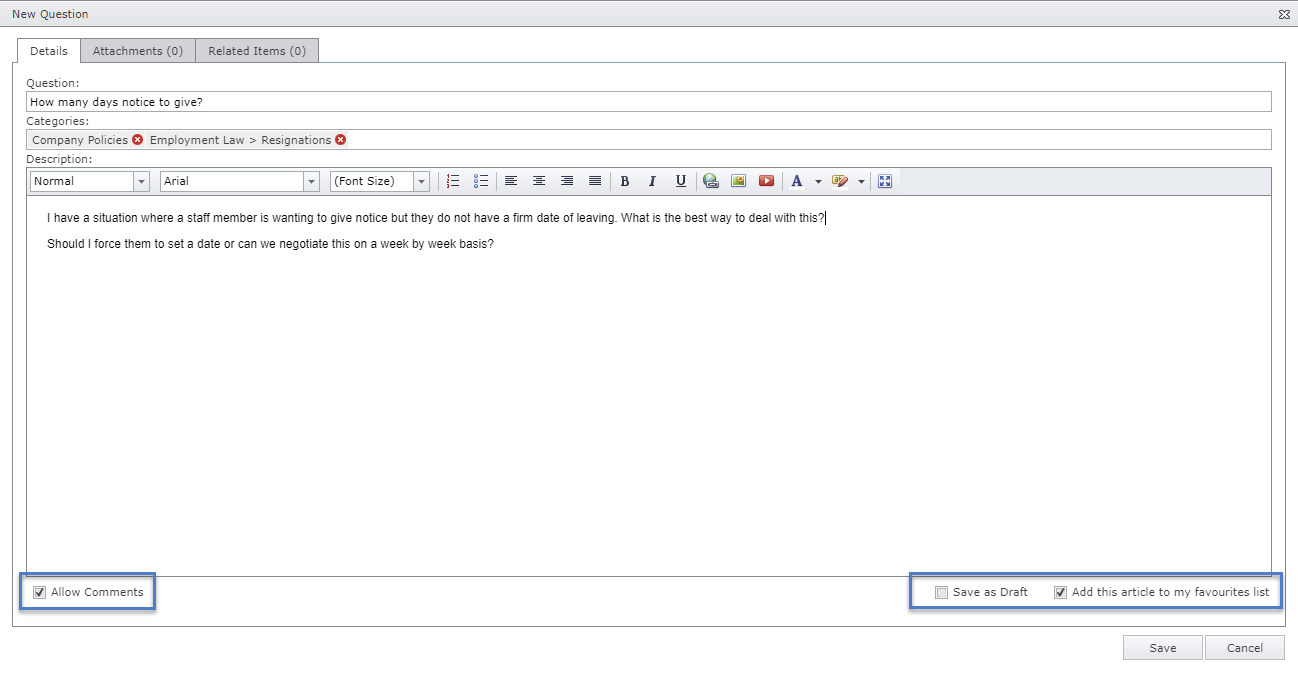
Allow Comments will be ticked on by default, this will allow others to post comments against this Question.
Save as Draft will save the question but it will not be visible to others, it can be edited as needed and then unticked to make it visible to others.
Add this article to my favourites list is also ticked on by default as it makes searching for your own posts much quicker.
Click Save to save the Question to the Knowledge Base.
The Question can be found against the Categories that were set against it.
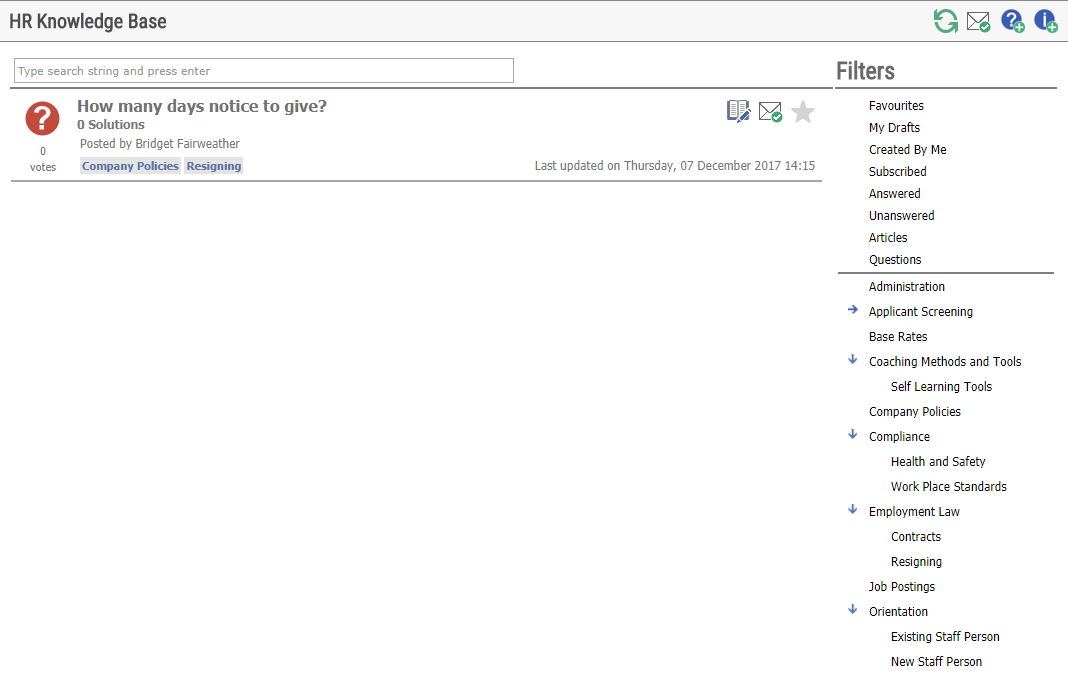
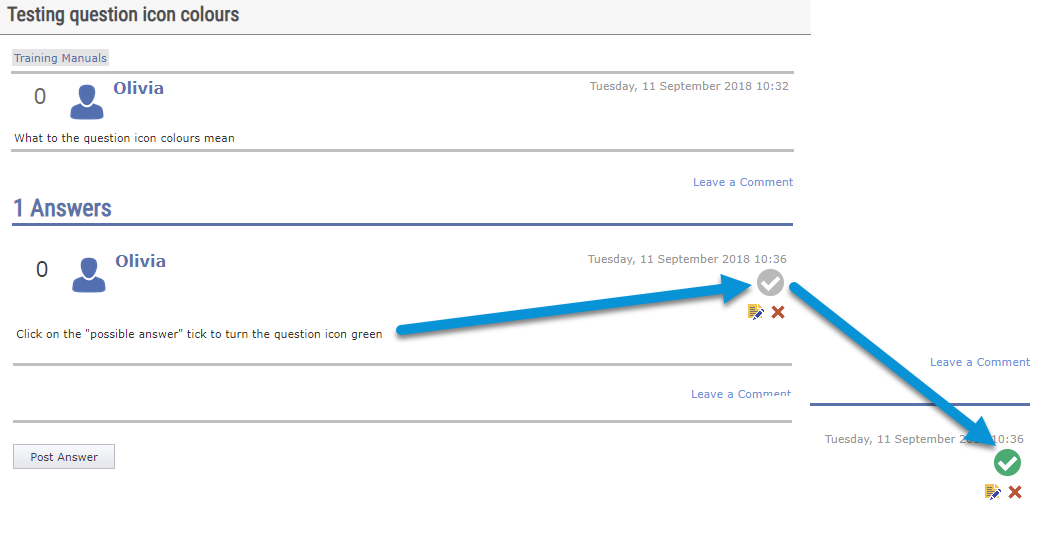
 The Question icon will change colour from blue which indicates the following:

Solution accepted
New Question, no solution
An answer is posted but possible answer not accepted
Create an Article
Click on the Create Article icon.
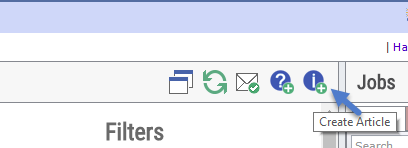
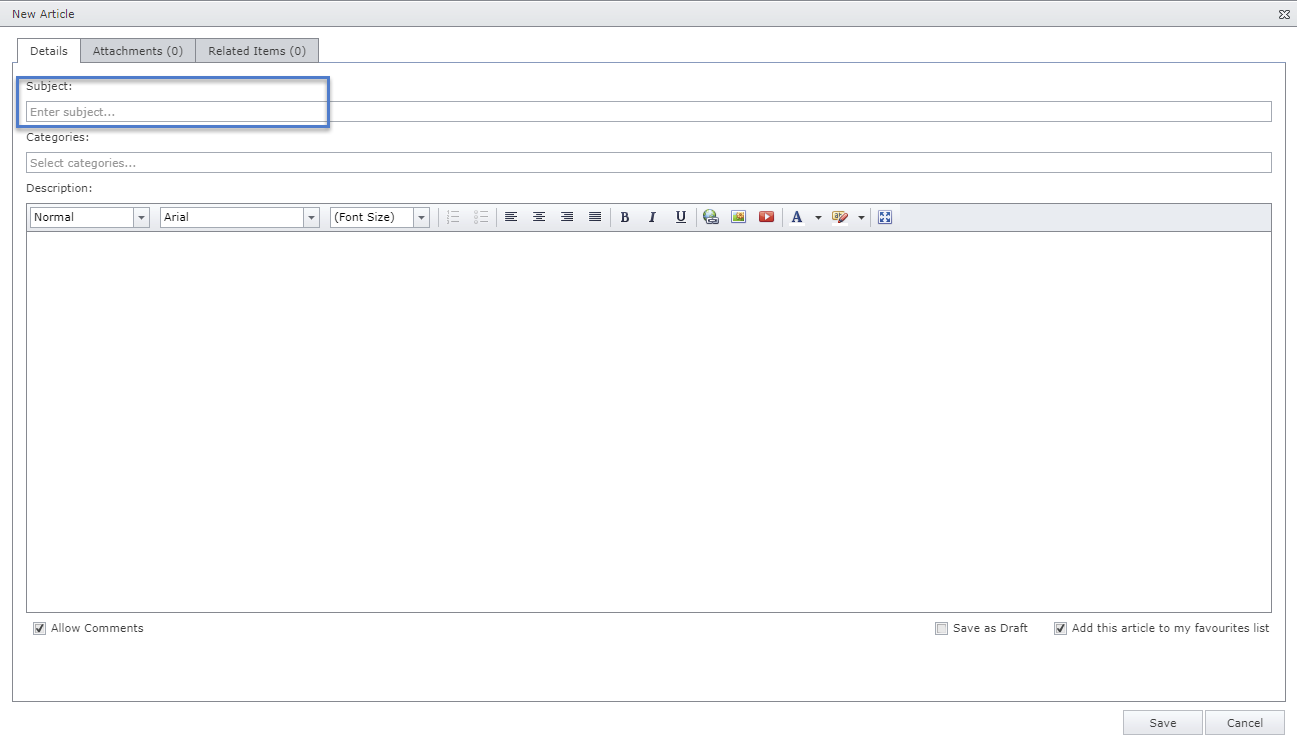
The New Article screen will pop up.
The Details tab is the landing page.
In this screen, the Article will need a meaningful Title.
Select at least one Category to assign the Article to.
To do this click on the Categories Field and a drop down list will appear.
Repeat this to add more than one Category.
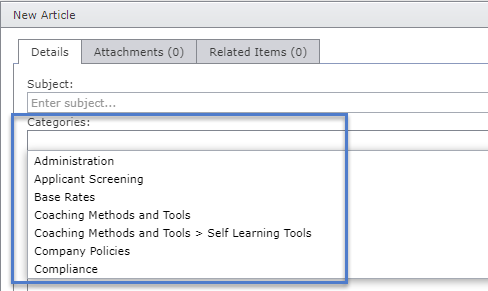
To assign under a Sub Category, these are displayed as “[Category] > [Sub Category]”, the same principal as “Ask a Question”.
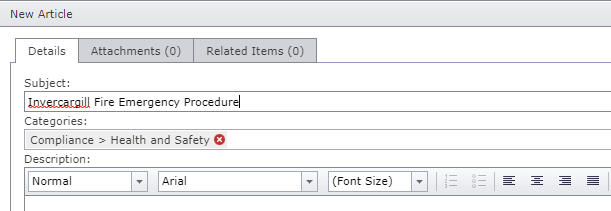
Enter in the Description of the Article.
There is some basic formatting tools for the content of the article.
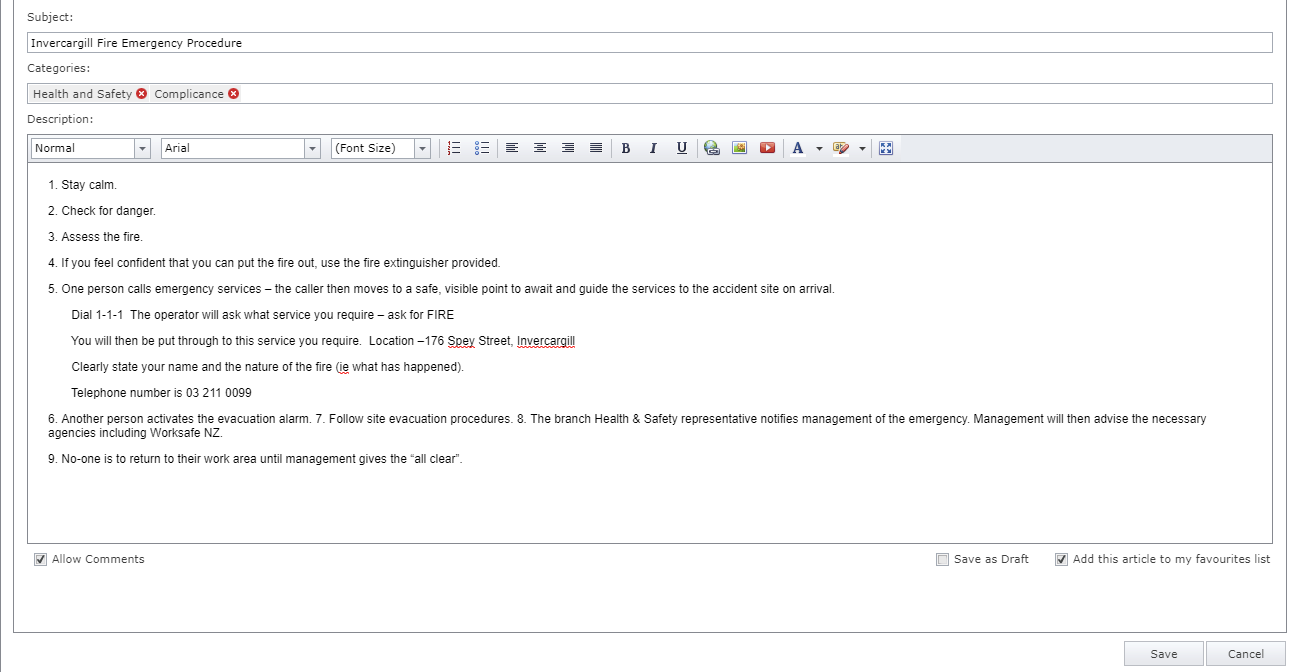
Allow Comments will be ticked on by default, this will allow others to post comments against the article.
Save as Draft will save the article but it will not be visible to others, it can be edited as needed and then unticked to make it visible to others.
Add this article to my favourites list is also ticked on by default as it makes searching for your own posts much quicker.
Click Save to save the Article to the Knowledge Base.
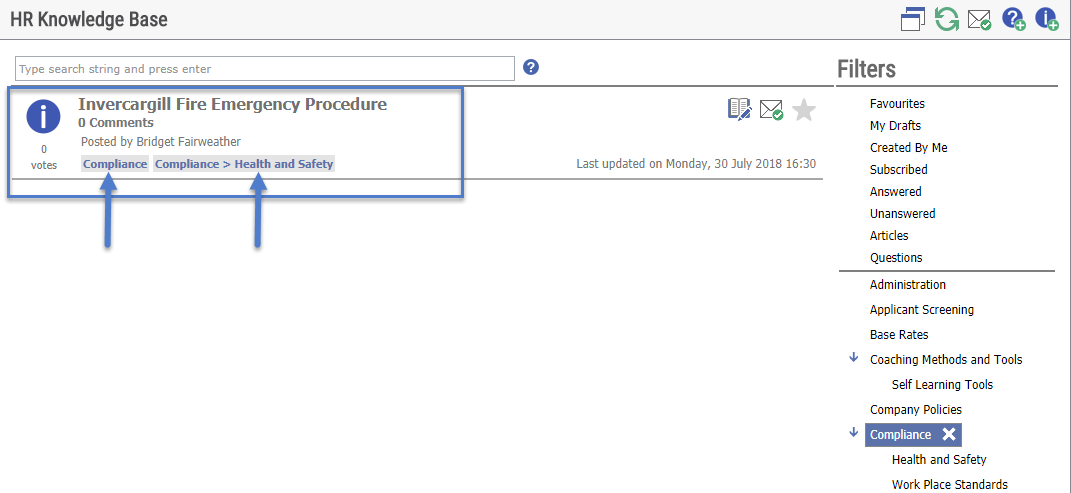
The Article can be found against the Categories that were set against it.
Add An Attachment to an Article or Question
On the attachments tab of an article or question there is the option to browse for the file you wish to attach via the browse button, files can also be dragged here to be attached as per below:
Note: multiple files can be dragged and attached at once.
You can also attach files via the Add Attachment icon.

The default settings against the attachment are specified in your TimeTrak Setup.
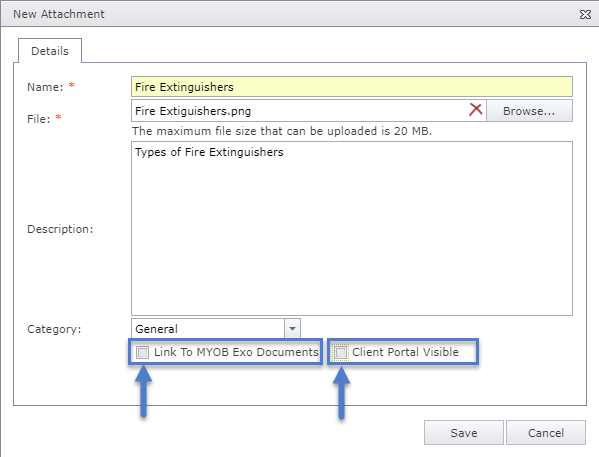
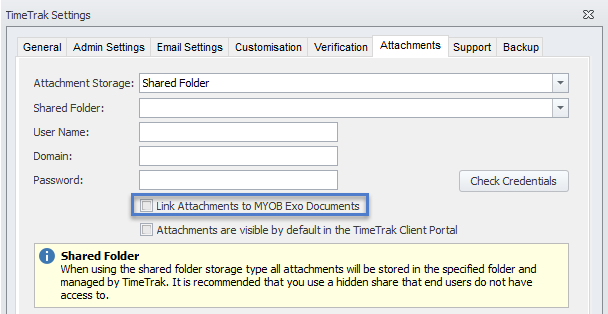
Link to MYOB Exo Documents will be ticked on or off by default based on what is set in your global system setup within the Admin Console as shown below:
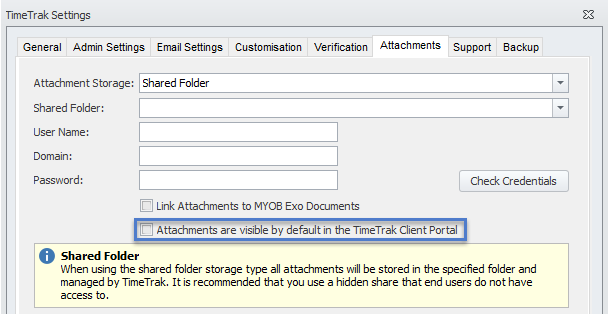
Client Portal Visible will be ticked on by default, based on what is set in your global system setup below:
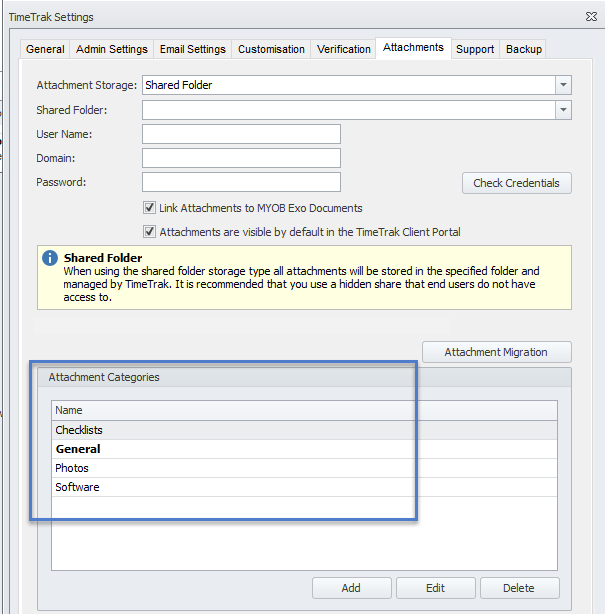
Category This is the category the attachment will be available against, these categories are again stipulated in the TimeTrak global setup.
Edit an Attachment against a Knowledge Base Item
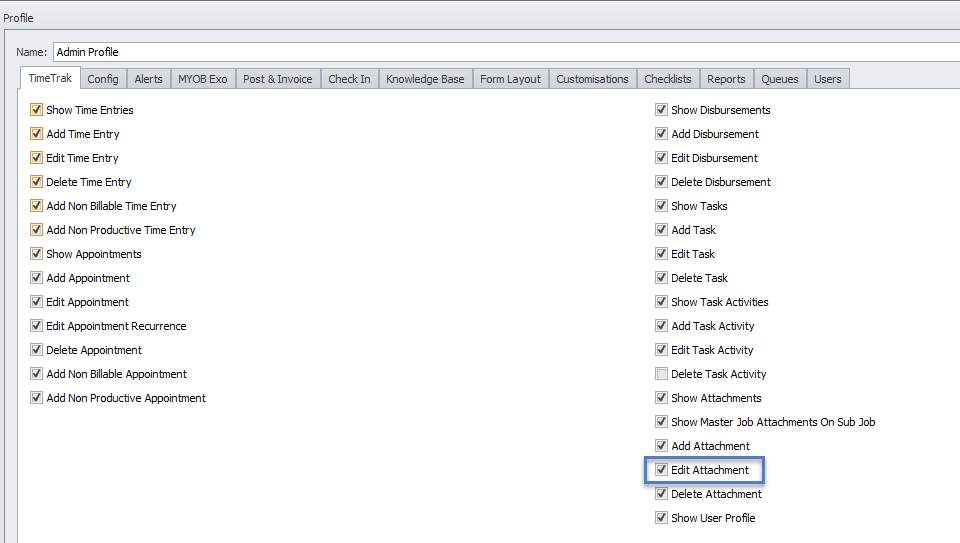
The ability to edit an attachment is based on the user’s TimeTrak Profile settings
1. Edit Attachment must be enabled as per below:
2. The knowledgebase must be visible against their profile not “read only”
Click Edit against the Article/ Question
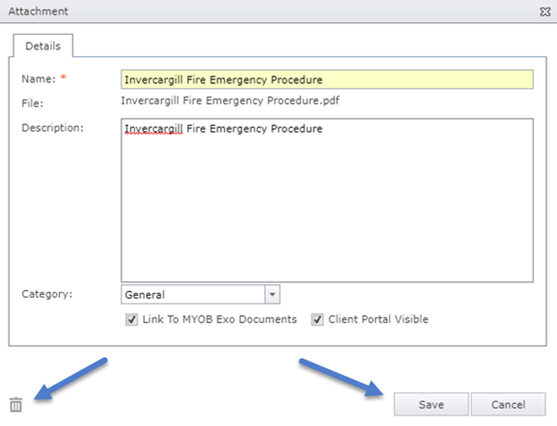
Then Click on the Edit Attachment icon against the attachment you wish to edit

This will open the attachment screen where you can edit the details of the attachment and save, or delete the attachment by clicking the icon.
Edit a Knowledge Base Article or Question
If permissions allow, users can click the “Edit” icon to edit the article/ question

Delete a Knowledge Base Article or Question
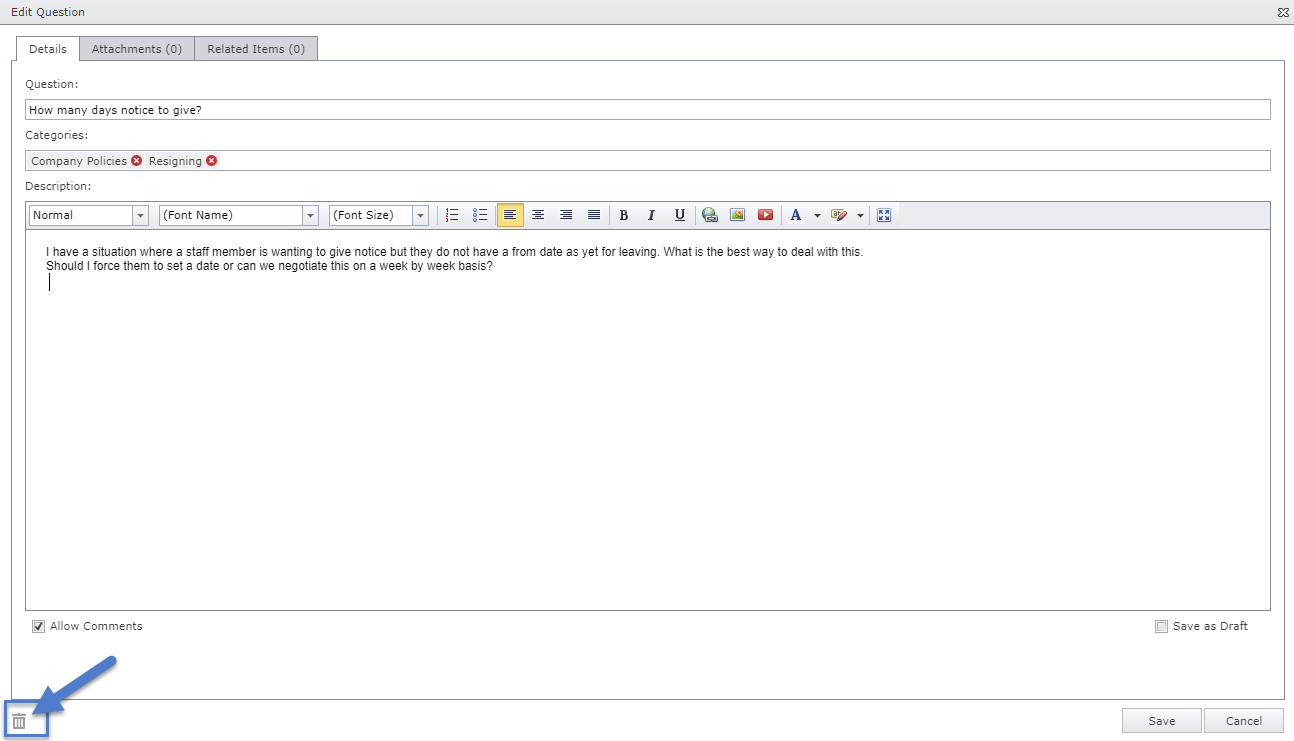
Click the edit icon against the article/ question

The Edit article/ question screen will apear.
Click the delete icon in the bottom left hand corner.
Relate an Article or Question
An article or question can be related against an Article, Client, Contact, Job, Task, Serviceable Unit or Stock Item.
When you relate an Article or question to any of these options the article can then be accessed via these.
E.g. Stock – In Mobile (only) you can search stock and it will have a link to the article.
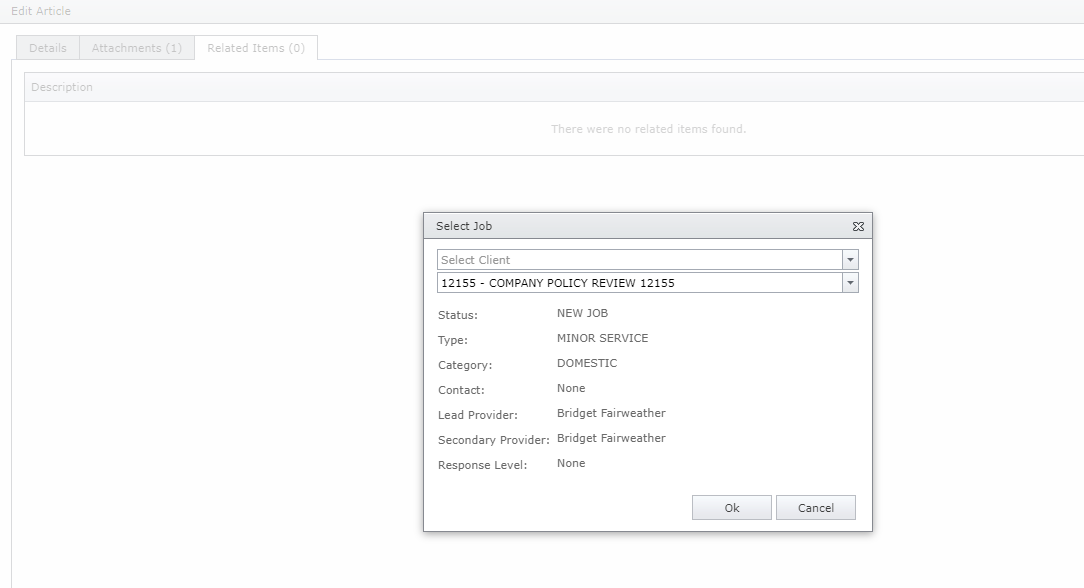
Relating an article or question can be done against the related items tab, click the “Relate” icon and select which option you would like to relate your article/ question to.

In this case the article is getting assigned to a job.
You can search/ select by client to limit the jobs or enter the job number directly.
Now from the related items tab users can click the job icon to view the job the article/ question is related to.

To remove the relation click the “Remove Related Item” Icon.

From the Knowledge Base home screen the job icon is visible to show users the article/ question is related to a job.
Hovering over the icon displays the job name.

Against the job, users can see there is an article related to the job via the articles tab.

Selecting the item will open it on screen for users to view.
Users can also remove the relationship between the article/ question from this here or add an additional realationship to another article/ question.
Share an Article or Question Link
Users may want to share an article they have created or think will be useful with a co-worker.
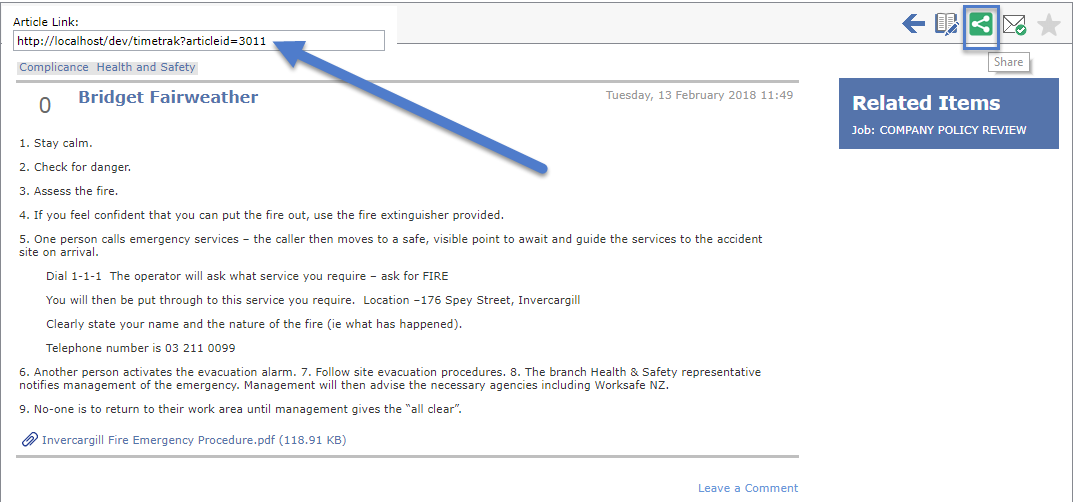
This can be done by clicking on the “Share” icon against the article or question, this will pop an Article Link box which users can then copy and send to a co-worker.
As long as they have a login to TimeTrak which has access to the Knowledge Base they will be able to go to the link.
Subscriptions
TimeTrak users can subscribe against a Knowledge Base to receive TimeTrak notifications and/or email notifications when new questions and/or articles are posted against the Knowledge Bases categories.
This can be done against the Knowledge Base by clicking the Subscriptions icon as below:

This will open the Subscriptions screen where users can specify which categories they would like to get notifications against as well as what type of notification they would like to receive.
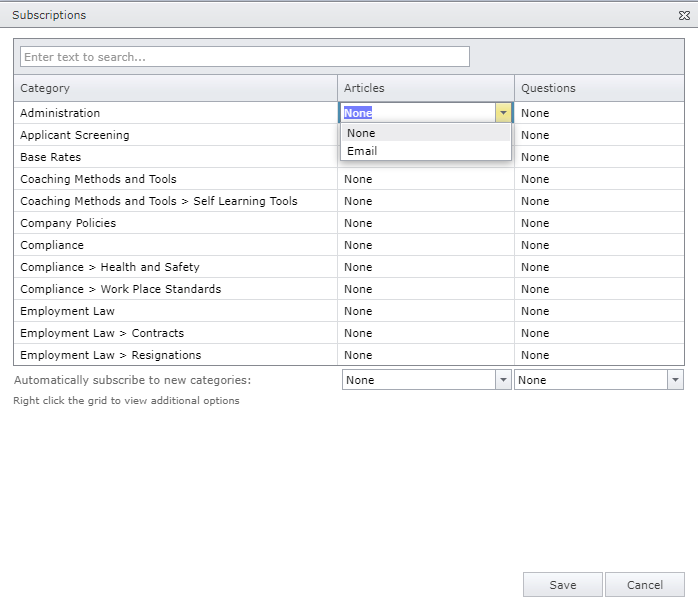
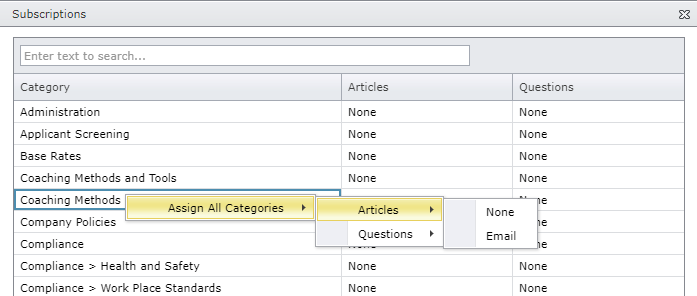
All categories can be updated at once instead of individually by right clicking on the grid.
There is also the option to automatically subscribe to any new categories added to a Knowledge Base.

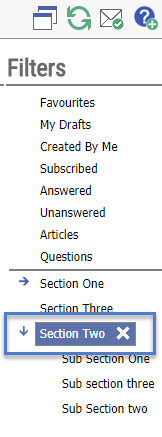
Filters and the Categories will show in a panel on the right-hand side of the Knowledge Base
Applying a Filter
Click on Category or Sub Category to apply a filter. This will display all articles or questions that have that Category or Sub Category assigned against them.
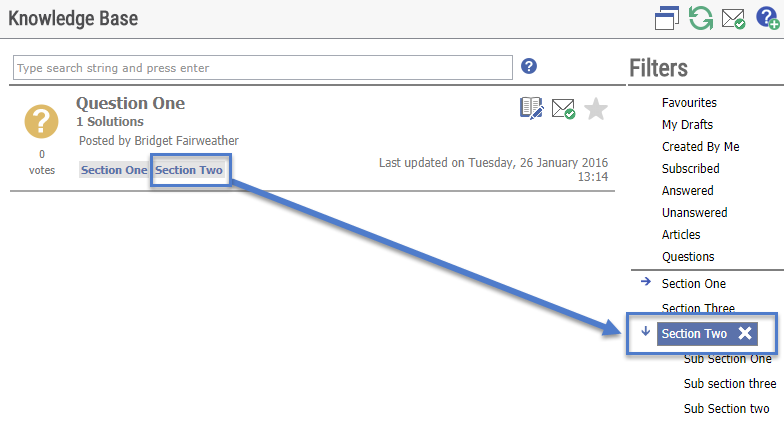
A filter is shown as applied when highlighted in blue and will remain highlighted when the mouse is navigated away from hovering over the selected filter. Only one filter can be applied at any one time. To remove the filter click on the “X”.
TimeTrak Mobile Knowledge Base
Articles and Questions created in TimeTrak Professional are also available in the field within TimeTrak Mobile.
Log into TimeTrak Mobile.
Under Profile, there is a Knowledge Base option, if this is enabled all Knowledge Bases visible against the user’s profile will be available from the home screen.
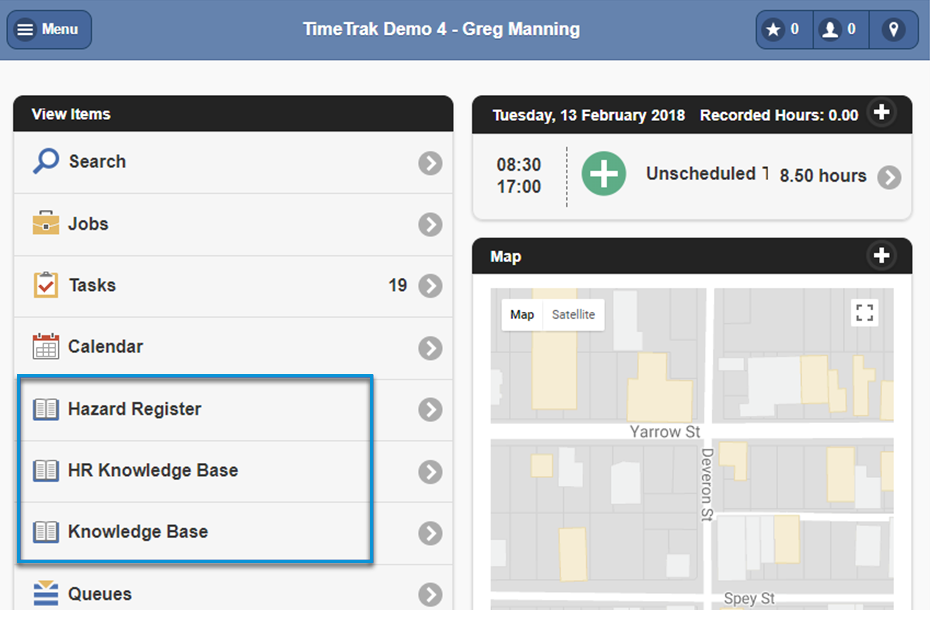
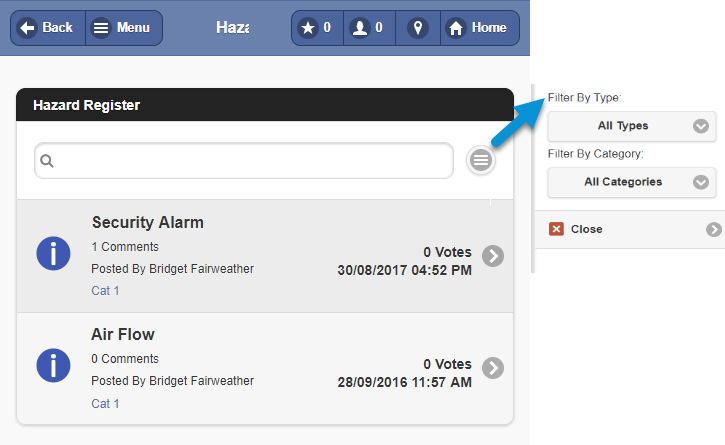
Click on a Knowledge Base link to open the Knowledge Base panel.
Filter for articles based on type and/or category.
Features within an Article/Question
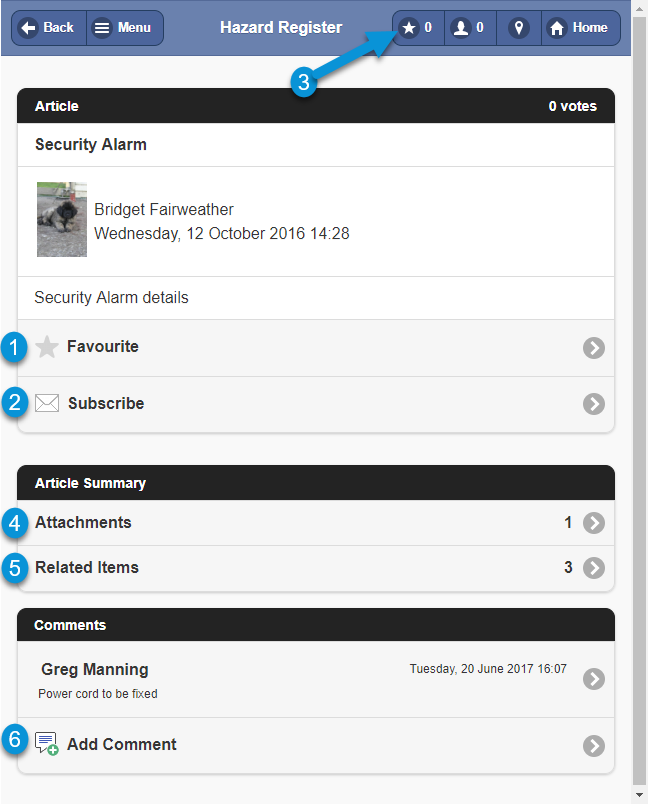
1. Favourite – Click to add the article/question as a favourite, the star will show as yellow when selected, it will also automatically set this as a subscription to the article/question. By clicking this again, it will remove the yellow star which removes it from your favourites. A list of favourites is only visible in Professional.

2. Subscribe – By clicking subscribe, the envelope will show a green tick on it when selected. By clicking this again will remove the green tick and unsubscribe to the article or question.

3. Notifications – If an article has been subscribed to, any updates to that article or question will show in notifications (star) on the header bar.


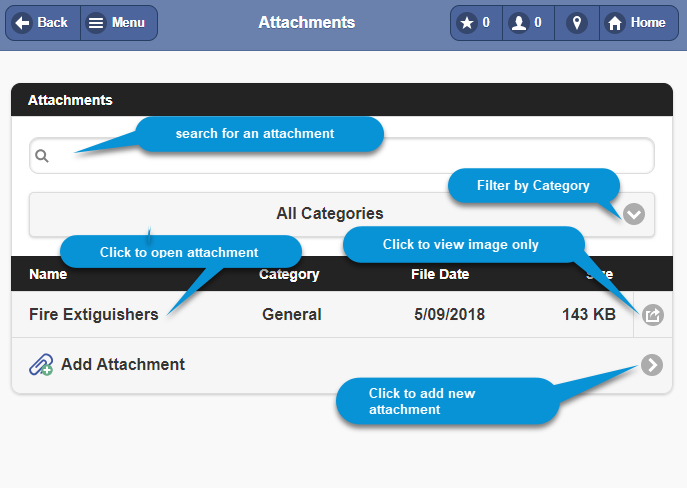
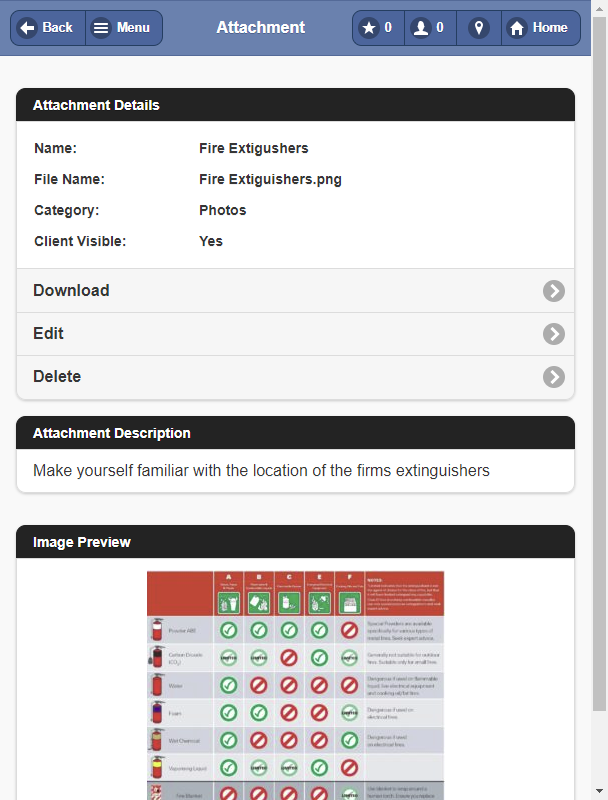
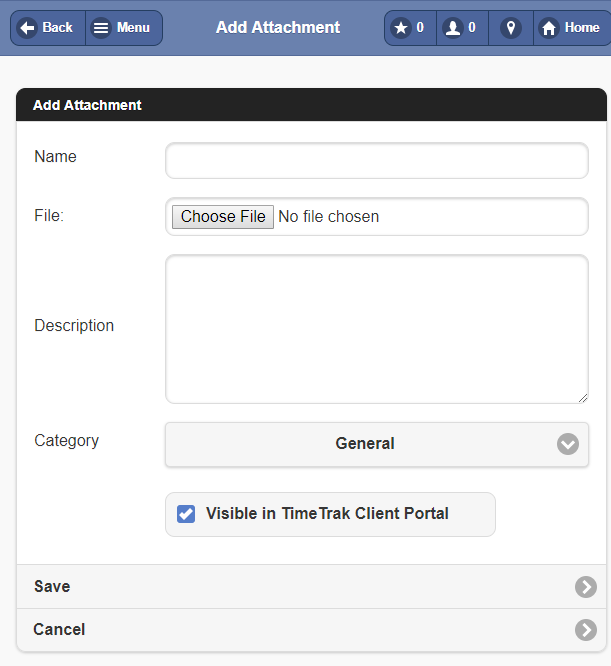
4. Attachments

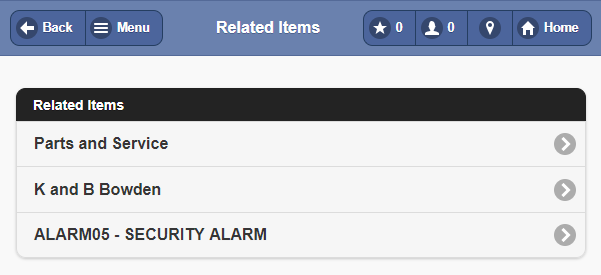
5. Related Items – users are easily directed to related items if they have been linked in the Knowledge Base set in Professional.
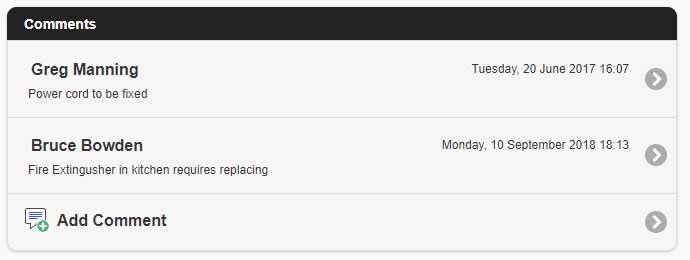
6. Add Comment – users can leave a comment.
Download Whitepaper PDF
If you have any questions, please contact the TimeTrak team: support@timetrak.benandhayley.nz or NZ: 0800 12 00 99 | AUS: 1800 60 80 77